October

25

2021

Every day, our Ideate Software Support team fields all types of questions from AECO professionals all around the world.

I recently had the pleasure of demonstrating Ideate Automation to one of our longtime customers. During the demonstration, I was asked if Ideate Automation could be used to process custom Ideate BIMLink definitions, specifically Revision Cloud Comments. Their goal was to periodically export certain Revision Cloud information for review. The data review could be read manually using pivot tables, Excel macros, or by other means, such as Power BI. Although we ship Ideate Automation with scripts that point to standard Ideate BIMLink link definition files, users can indeed use Ideate Automation to process custom Ideate BIMLink link definitions.

Here is the process to accomplish the requested task.

Step 1

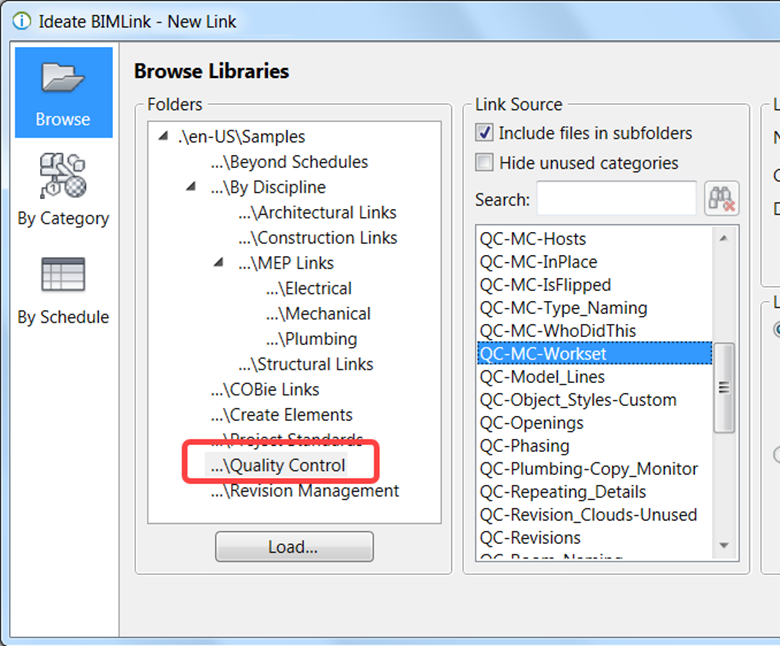
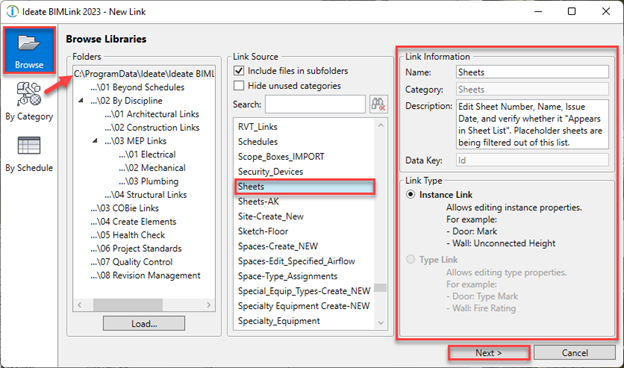
In Ideate BIMLink, begin with a pre-configured link that meets most of your criteria. In this example, we began with the Revision_Clouds-Review link definition.

Ideate BIMLink and Ideate Automation

 
Step 2

Add or remove parameters, as necessary, until the link definition meets your criteria. In this case, we removed a few parameters that were not needed for the QA/QC task.

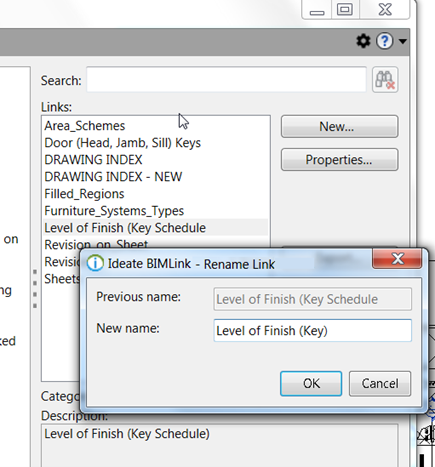
If there are other links that you want to customize, go ahead and do so. It may be a good idea to rename the link definitions and edit the comments section, so they describe the link in detail.

Step 3

After customizing the link(s), right click on them and save them to a folder location that Ideate Automation can access. Once completed, close out of all open Revit versions and launch Ideate Automation.

Ideate BIMLink and Ideate Automation

Step 4

For the example that was presented, we used the IBL-MP-Export_Publish task. The advantage of using this script is that we can process the custom link definition(s) exported from Ideate BIMLink for multiple Revit files and export multiple links to one excel file on a per-project basis.

Ideate BIMLink and Ideate Automation


The Ideate Automation steps for this workflow are as follow:

  1. Select the IBL-MP-Export_Publish script
  2. Browse and select the Revit file(s) you wish to process
  3. Select a folder where the Revision information for each Revit project will be exported. For this script, all file exports will end up in the export folder location you choose
  4. Modify the Excel export file names, if required. The default setting for this script is the Revit file name, plus today’s date, followed by the Excel file extension of .xlsx
  5. Browse to the folder location where you exported your custom BIMLink link definitions. ALL links in this folder will be processed by Ideate Automation, so if there are any links that you do not want to process, you may want to move those links to a different folder
  6. Select Create & Run to let Ideate Automation process the selected Revit files from Step 2
  7. Be sure to review the Ideate Automation Queue for any errors. A successful process will return an Error Code 0

Shown here is an example of the files that were outputted as a result. In this example, we chose four Revit files for Ideate Automation to process and export revision data from:

Ideate BIMLink and Ideate Automation

The results of the demonstration with our customer was an Excel file that exported their required Revision Cloud comments. From there, the data could be edited and imported back into the Revit model using Ideate BIMLink or the data can simply be reviewed as part of their QA/QC process.

Browse our website for more information on our Revit productivity tools. Give them a try with a free trial version or subscribe today

View more posts in our Support Series.


About the Author

Sash Kazeminejad - AIA, LEED AP - Customer Success Manager
Sash earned his Master of Architecture from Montana State University and is a California registered architect, LEED Accredited Professional. He has extensive experience in project management; BIM management; design for architectural firms in California, Montana, and Oregon; and leading classroom and online BIM training. He provides consulting, sales, support, and training solutions to AECO customers around the globe. Find Sash on LinkedIn.


Read More

September

27

2021

Every day, our Ideate Software Support team fields all types of questions from AECO professionals all around the world. A recent customer request came into our queue that asked about the ability of Ideate StyleManager to modify the color property of a CAD Import element:

“We have several imported [CAD] details from our façade consultants that require color to be edited to prevent an imported hatch from creating a large black area on our drawings.”

Revit manages CAD Imports as Object Styles unless they are exploded, in which case they become Line Styles. In the customer’s case, the CAD Import was not exploded, so Ideate StyleManager could absolutely be used to analyze, merge or delete these styles. However, the goal was to batch edit the colors of these object styles without exploding the CAD Import.

Imported Line Styles
Ideate StyleManager main dialog showing the DWG lines as Imported Object Styles

In this specific case, our support team advised that Ideate BIMLink would be a better fit for the requested task. Even though this customer was specifically asking about Ideate StyleManager, they have access to the full Ideate Software suite. When you have access to the Suite of Solutions from Ideate Software, you can use the best tool for the workflow or task.

Step-by-Step Instructions

To edit the color, line weight or material of Revit Object Styles:

  1. Launch Ideate BIMLink
  2. Select New
  3. Pick the Category option at left
  4. type 'object' in the search box to find Object Styles
  5. Pick the sample link called "Project_Stds-Object_Styles"

Imported Line Styles 
Ideate BIMLink Dialog after selecting NEW and typing ‘object’ into the Search criteria

  1. Optionally, you can limit the export to only edit the CAD Import Styles by setting the Link Definition Filter as shown:

Imported Line Styles 
Setting the Filter in BIMLink to only export CAD Imported Styles

  1. Export to Excel
  2. In Excel, change the line colors and patterns as needed
  3. Import back into Revit using Ideate BIMLink

In this specific example, the combination of using both Ideate StyleManager and Ideate BIMLink was an excellent solution that delighted this customer.

“Wow, awesome workflow!

This is what I was looking for. Very easy to access all the properties there.

Thank you!”

It’s a good idea to review other Project Standards samples via the Ideate BIMLink library definitions by reviewing this online Help topic.

Let us know how you use Ideate Software solutions to create the most consistent project standards for your Revit models. We love to hear from our customers about how they are using our Ideate Software solutions to solve difficult and time-consuming Revit workflows.

This post is part of a series of real questions posed to our Support team and our solutions. View more


About the Author

Richard W. Taylor, Associate AIA – Technical Evangelist 
Richard has more than 30 years of experience working for companies that develop architectural and engineering software solutions, such as Intergraph, Bentley, and Autodesk. He has over 20 years of Revit experience, and he was part of the original development of Revit while at Revit Technology Corporation. He worked for 12 years at Autodesk, where he presented, taught, and worked to improve features in Revit. Richard holds both a Bachelor of Science in Architectural Studies and Master of Architecture from the University of Nebraska, Lincoln. As Technical Evangelist, Richard works with AECO clients worldwide, developing and consulting on BIM solutions. Find Richard on Twitter and LinkedIn.

Read More

August

25

2021

Every day, our Ideate Software Support team fields all types of questions from AECO professionals all around the world.

Recently, a customer asked us about the ability to find Revit In-Place families using Ideate Explorer. We actually have a nice Ideate Explorer Help Topic on exactly that workflow using Ideate Query, which is a component of Ideate Explorer.

If fact, we have a number of Ideate Query examples for different discipline workflows such as Architectural, Structural, or MEP that are posted to our Online Help for Ideate Explorer.

But did you know that with the May 2021 release of Ideate Explorer we’ve updated the number of available properties that can be selected from three to FIVE

Ideate Query
Ideate Query dialog showing the new ability to choose up to FIVE fabulous properties

Did you also know that you can sort on ANY column by just clicking on the column header within the dialog?

Ideate Explorer - Revit In-Place Families
Here, I’m clicking on the “Is Pinned” column header to sort all the In-Place families by their pinned status

You can also move the columns and data around by just dragging and dropping them by the column header. I might want to move columns around to better analyze the results and additionally make it easier to select them. 

Ideate Explorer - Revit In-Place Families
I’ve moved the columns around to have the Pinned Status immediately after the Family Name

You can change the property selection by using a crtl+select on a property that is already included within the results. This will remove the property from the list. Then, you can add a different property if you’ve already reached the five property limit.

Ideate Explorer - Revit In-Place Families 
I’ve removed workset and added Room Name

We also have a few specific videos for using Ideate Query to Select by Host Phase and using Ideate Query to audit elements in groups.

If you are new to Ideate Query, this short video is an excellent overview about the value for all Revit users.

So, Ideate Query may not be the original Fabulous Five British Invasion, but let’s Twist and Shout and Come Together over Ideate Explorer With a Little Help From My Friend, Ideate Query.


About the Author

Richard W. Taylor, Associate AIA – Technical Evangelist 
Richard has more than 30 years of experience working for companies that develop architectural and engineering software solutions, such as Intergraph, Bentley, and Autodesk. He has over 20 years of Revit experience, and he was part of the original development of Revit while at Revit Technology Corporation. He worked for 12 years at Autodesk, where he presented, taught, and worked to improve features in Revit. Richard holds both a Bachelor of Science in Architectural Studies and Master of Architecture from the University of Nebraska, Lincoln. As Technical Evangelist, Richard works with AECO clients worldwide, developing and consulting on BIM solutions. Find Richard on Twitter and LinkedIn.

Read More

July

27

2021

Every day, our Ideate Software Support team fields all types of questions from AECO professionals all around the world. In this series of support blog posts, we highlight questions and our answers.

I’m a big fan of ice cream! One of my favorite dishes is locally called a Smoosh-In, where several different ice cream flavors or toppings are combined in fun ways. This same concept can be applied to Revit where you need to smoosh several parameters or properties into a single item like a Door Mark.

Here is a recent support question that came from a customer with a specific request. However, it’s a broader question that gets asked in so many different ways by our Ideate Software customers. 

The customer asked: “If I wanted to renumber doors by exporting Door Marks out into Excel, is there a way in Excel to select a large number of fields (Door Mark IDs from one level) and automate the sequential numbering of selected fields with a prefix? For example, I would want to renumber door Marks to follow this naming convention of:

<DoorFunction>-<Level>-DoorNumber>

Example = ID-00-001, ID-00-002 etc.”

Ideate BIMLink excels at this!  (OK, pun intended)

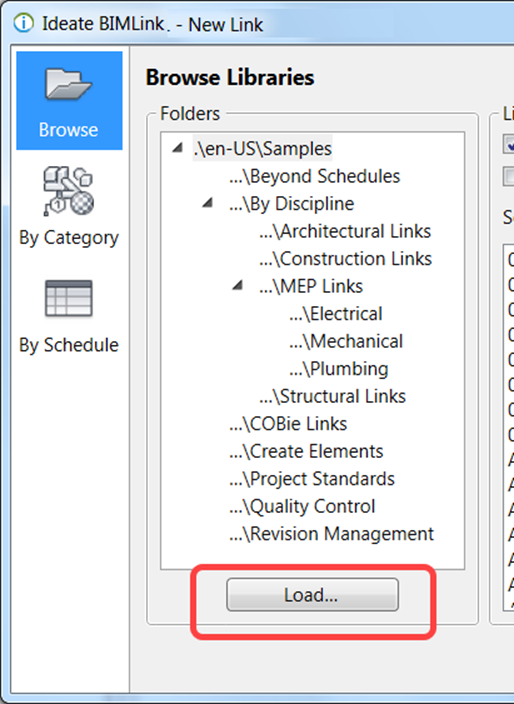
I know that I’ve mentioned this a dozen times, but it’s always good to start with one of our pre-defined Library Link Definitions that you can easily browse to locate. A simple one to use and potentially modify is just called Doors. Notice that it is defined as an Instance link because we want to edit each instance of the Door Mark’s value.

Ideate BIMLink - Libraries
Creating a new Link Definition by browsing the Library Definitions

You will want to be sure to add the properties that you might want to use within the door tag to smoosh together. I just added Assembly Code and Keynote as two property options.

Ideate BIMLink - Edit Doors Link
Select from many available properties from Doors, categories and additional properties from the dropdown list.

Once you export the information to Excel, you can use an Excel formula to combine the information. I first might want to create a “scratch” column or temporary workspace to just renumber the doors in a sequential order. That’s what I’ve done with column “I” in the Excel image below. Then I’ve used a formula within the Mark cell to combine Level Name as well as Keynote properties. Of course, keep in mind that your Door Tag family might need to be enlarged to contain the text string. In many cases, you may just have a level prefix such as 01, 02, etc. plus the Door Number, as was requested by this customer. They also wanted the Door Function, which is probably a short code.

(Click image to enlarge)

 Ideat BIMLink
The Excel export from Ideate BIMLink showing the formula definition within cell B2

If you would like to learn now to place From Room data and To Room data within a Door Tag, we have an excellent blog article and video that explain the process, which is similar to the process I outlined above.

For more tips and information, please review the online Help topics for Ideate BIMLink. Our Frequently Asked Questions page is also a good place to start.   

Once you have mastered the property/parameter combinations, I recommend you celebrate with some ice cream, and be sure to combine many flavors together for your own Smoosh-In!


About the Author

Richard W. Taylor, Associate AIA – Technical Evangelist 
Richard has more than 30 years of experience working for companies that develop architectural and engineering software solutions, such as Intergraph, Bentley, and Autodesk. He has over 20 years of Revit experience, and he was part of the original development of Revit while at Revit Technology Corporation. He worked for 12 years at Autodesk, where he presented, taught, and worked to improve features in Revit. Richard holds both a Bachelor of Science in Architectural Studies and Master of Architecture from the University of Nebraska, Lincoln. As Technical Evangelist, Richard works with AECO clients worldwide, developing and consulting on BIM solutions. Find Richard on Twitter and LinkedIn.

Read More

May

26

2021

Every day, our Ideate Software Support team fields all types of questions from AECO professionals all around the world. 

Did you know that if you are an Ideate Software customer, you can request a dataset containing instructions, sample datasets and solutions for a variety of challenging Revit workflows? We see these requests for datasets cross our Support desk all the time, so please don’t be shy in requesting the information from us.

Here are short descriptions of what we offer:

  1. BOMA Dataset for Ideate BIMLink - BOMA is an acronym for the Building Owners and Managers Association. Please read this BOMA Calculations blog article by Sash Kazeminejad that explains our available dataset and the workflow process in detail.

    Dataset


  1. Programming with Masses Dataset for Ideate BIMLink - Please review this informative blog article about how you can use Ideate BIMLink to assist with creating Revit Masses for programming requirements.

    Dataset
     
  1. Sample Pivot Table Dataset for Ideate BIMLink - Please review this Ideate BIMLink Help topic on how to use pivot tables in Excel with Ideate BIMLink.  We even have a snazzy new video on the subject!


  2. Plumbing Fixture Counts Dataset for Ideate BIMLink and Ideate Sticky - This online Help topic is a great place to start for reviewing Plumbing Fixture Counts or Occupancy Summaries. You can also read this blog article on the topic.

    Dataset


  1. Pile Cap Renumbering Dataset - Check out this excellent blog article that details the specific challenge of numbering Pile Caps because they need to be numbered in a way that reflects their relative location as well as their relationship to the nested pile families. Using Ideate ReNumber is easy and efficient. 

    Dataset
     
  2. Document Issue Record (DIR) Dataset - Last but not least, this is one of our MOST requested datasets. You can review the main blog post detailing how you can use Ideate Software applications to manage the sheet revision process, and you can also review this follow-up blog post for customizing the Document Issue Record. We also have information in our online Help for Managing Revit Sheet-based Revisions with Ideate BIMLink. Using both Ideate BIMLink and Ideate Sticky together allows perfect synergy.

    Dataset


Summary

  1. BOMA Dataset
  2. Massing Dataset
  3. Pivot Table Sample Dataset
  4. Plumbing Fixture Counts Dataset
  5. Renumbering Pile Cap Dataset
  6. Document Issue Records (Revision) Dataset

So please don’t beat your head against the wall trying to create your own solutions. Send an email to [email protected] and request one dataset or request them all!  We will be waiting to hear from you!

This post is one in our series covering questions frequently addressed by our Support team. View other posts in the series. 


About the Author

Richard W. Taylor, Associate AIA – Technical Evangelist 
Richard has more than 30 years of experience working for companies that develop architectural and engineering software solutions, such as Intergraph, Bentley, and Autodesk. He has over 20 years of Revit experience, and he was part of the original development of Revit while at Revit Technology Corporation. He worked for 12 years at Autodesk, where he presented, taught, and worked to improve features in Revit. Richard holds both a Bachelor of Science in Architectural Studies and Master of Architecture from the University of Nebraska, Lincoln. As Technical Evangelist, Richard works with AECO clients worldwide, developing and consulting on BIM solutions. Find Richard on Twitter and LinkedIn.

Read More