July

13

2022

Every day, our Ideate Software Support team fields all types of questions from AECO professionals all around the world. You can review some of these recent question and answers via our Ideate Software Support Series blog category.

This was an interesting question that came into our support queue. The customer had a series of rooms on different split levels where the rooms were all visible in the same plan view. This customer was using the Select Path – Crossing method within Ideate ReNumber, but Ideate ReNumber wasn’t picking up the room on the Mezzanine level below.

Ideate ReNumber - Room on Messanine below leval 2
Here is a simple example showing the rooms in section with one room being located on the Mezzanine level, which is below the main Level 2.


Ideate ReNumber - Split Levels - Select path Crossing Section Method
When using the Select Path – Crossing selection method, only the rooms on Level 2 were being selected for renumbering.

The customer could easily select each room element with the Select Elements method within Ideate ReNumber, but the crossing didn’t seem to pick up the room below on the Mezzanine Level.

The better method for selecting rooms that might vary over different split levels would be to use the Select Path – Vertex method. The reason is that the vertex method uses a different algorithm. In the vertex method, the path vertex is projected as a ray into the view from the viewpoint direction (i.e., negative z axis) of the user. The room or space is chosen for numbering if a point on the ray at the height of the view cut plane is within the room.

Ideate ReNumber - Split Levels - Select Path - Vertex Method
When using the Select Path – Vertex selection method, ALL the rooms on Level 2 are selected for renumbering.

Therefore, we recommend using either the Select Elements method or the Select Path – Vertex method when specifically dealing with rooms that may vary over different levels. This method is also recommended because it supports more complex paths.The vertex method can handle a path that crosses over itself to support complex room numbering. 

Ideate ReNumber - Selecting Split Levels - Complex Path

This is an example of a complex path that passes over itself.  This is supported very nicely with the Select Path – Vertex selection method.

Please review all the different numbering methods available within Ideate ReNumber and all the excellent How to Use Ideate ReNumber topics from our online HELP files for additional information.

If you have any comments on how we can improve our user interfaces, please let us know! Just send an email to [email protected].

Learn More

Browse our website to learn more about our Revit plugin tools. Download a free trial or subscribe today

Stay Connected

Check us out on Twitter, LinkedIn, Facebook, and YouTube.


About the Author

Richard W. Taylor, Associate AIA – Technical Evangelist 
Richard has more than 30 years of experience working for companies that develop architectural and engineering software solutions, such as Intergraph, Bentley, and Autodesk. He has over 20 years of Revit experience, and he was part of the original development of Revit while at Revit Technology Corporation. He worked for 12 years at Autodesk, where he presented, taught, and worked to improve features in Revit. Richard holds both a Bachelor of Science in Architectural Studies and Master of Architecture from the University of Nebraska, Lincoln. As Technical Evangelist, Richard works with AECO clients worldwide, developing and consulting on BIM solutions. Find Richard on Twitter and LinkedIn.


Read More

June

8

2022

Every day, our Ideate Software Support team fields all types of questions from AECO professionals all around the world. You can review some of these recent question and answers via our Ideate Software Support Series blog category.

Thousands of Revit users all around the world use Ideate Sticky every day to combine the ease and flexibility of Excel, Word, and PDF editing with the convenience of a sticky note. Ideate Sticky elegantly connects non-BIM data from an Excel, Word, or PDF document into Revit projects, enhancing cross-team workflows.

A recent customer contacted us to ask why the cell fill color and the colored text in Excel was displaying only black and white when they linked the Excel file into Revit as a Sticky schedule.

Several situations can prevent the desired colors from displaying within Revit.

  1. Excel may have an override Black and White setting selected within the Sheet tab of the Page Setup dialog. This will cause any Excel file to be black and white within either a Schedule or Image for Ideate Sticky. It’s important to understand that this setting will override any color setting you may have selected within Ideate Sticky Images method shown below.

    Ideate Sticky - Print Setting dialog within Excel
    Access the Page Setup – Print Settings dialog within Excel to review Sheet settings to ensure the Black and White override is not selected.
     
  2. If you are using the Images method within Ideate Sticky, there are additional settings to override the Excel, PDF, or Word document to Black and White or Grayscale. You can also make the background transparent which is extremely useful when you have multiple images on a view or sheet that are close to each other.

    Ideate Sticky Images Method
    For Ideate Sticky Images method, there are additional color, greyscale, and transparent settings.
     
  3. Conditional formatting is currently not supported within the Ideate Sticky Schedules method. Color fills, text overrides, etc., that are a result of conditional formatting will be ignored. The underlying cell formatting, which can be seen when you place your cursor within the cell, will be utilized instead.   However, this conditional formatting is now supported within the Ideate Sticky Images method. 

Here is an excellent blog post on color fills that was written before we introduced our Ideate Sticky images method. All the information within this blog is still valid for the Ideate Sticky Schedules method. If you want to see the conditional formatting, you should now use the Ideate Sticky Images method instead.

At the end of the day, this specific customer had the override Black and White checkbox selected within Excel. Unchecking that selection within Excel produced the desired colors within the Ideate Sticky schedule.

Keep those amazing questions coming to [email protected] and we will keep answering them!

Learn More

Browse our website to learn more about our Revit plugin tools. Download a free trial or subscribe today

Stay Connected

Check us out on Twitter, LinkedIn, Facebook, and YouTube.


About the Author

Richard W. Taylor, Associate AIA – Technical Evangelist 
Richard has more than 30 years of experience working for companies that develop architectural and engineering software solutions, such as Intergraph, Bentley, and Autodesk. He has over 20 years of Revit experience, and he was part of the original development of Revit while at Revit Technology Corporation. He worked for 12 years at Autodesk, where he presented, taught, and worked to improve features in Revit. Richard holds both a Bachelor of Science in Architectural Studies and Master of Architecture from the University of Nebraska, Lincoln. As Technical Evangelist, Richard works with AECO clients worldwide, developing and consulting on BIM solutions. Find Richard on Twitter and LinkedIn.


Read More

May

13

2022

Every day, our Ideate Software Support team fields all types of questions from AECO professionals all around the world. You can review some of these recent question and answers via our Ideate Software Support Series blog category.

Ideate Explorer has been a Revit user’s best friend for almost 14 years! Since the first release of Ideate Explorer, Revit users have been using the application to show model elements that the default Revit project browser just does not show. Ideate Explorer is the model browser for almost every element within your Revit model.

The Ideate Warnings Manager within Ideate Explorer is an extremely powerful and useful tool for organizing, reviewing, and fixing Revit warnings. 

Here is a question we got from a longstanding Ideate Software customer from Australia about if we could isolate or sort warnings by level:

“Do you know if there is a way to organize warnings by level? I am working on a project where it is delivered in zones. Obviously, it would be great to remove or fix warnings in the whole project but that isn’t possible due to time constraints. Currently I have to go through the warnings and try and remove as many as I can, but I only want to do it for the zones that need issuing.”

Using Ideate Explorer’s powerful search engine, you can select on the Warnings Tab within Ideate Explorer and enter the level name you are seeking within the search field. This will show you ONLY the elements with a specific Warning Type contained on the level you selected. As an example, if you search for Level 6 and there is a wall on Level 5 and wall on Level 6 that have the overlap warning, then you would see both elements because as least ONE component of the Warning Type is on Level 6.

 
You can enter a level name in the search field to show only warnings sorted by types where at least one component of the warning is on the specified level.

 
You might also want to show only warnings by Room or “Created by” or “Last Updated By” as some more examples.

Be sure to review our Help topic on Resolving Revit Warnings with Ideate Explorer and watch our online videos for more workflows featuring Ideate Explorer.

Keep those amazing questions coming to [email protected] and we will keep answering them!

Do you have a support question?

Just send an email.

Learn More

Browse our website to learn more. Download a free trial or subscribe today

Stay Connected

Check us out on Twitter, LinkedIn, Facebook, and YouTube.


About the Author

Richard W. Taylor, Associate AIA – Technical Evangelist 
Richard has more than 30 years of experience working for companies that develop architectural and engineering software solutions, such as Intergraph, Bentley, and Autodesk. He has over 20 years of Revit experience, and he was part of the original development of Revit while at Revit Technology Corporation. He worked for 12 years at Autodesk, where he presented, taught, and worked to improve features in Revit. Richard holds both a Bachelor of Science in Architectural Studies and Master of Architecture from the University of Nebraska, Lincoln. As Technical Evangelist, Richard works with AECO clients worldwide, developing and consulting on BIM solutions. Find Richard on Twitter and LinkedIn.


-------------------------------------------------------------------------------------------------------------------------------------------

Would you like to learn more about Managing Revit warnings with Ideate Explorer?

Warnings management is a hot topic with Revit users around the world. Our website houses many resources that describe the value of the Ideate Warnings Manager component of Ideate Explorer, as well as how to use the powerful plugin to keep your Revit projects clean and functioning well. For easy access, here are links to and descriptions of just a few:  

  • Help File: Set up and Deploy Warnings Standards 

    To gather consistent and relevant warnings data, you need to determine which Revit warnings are important to you and assign the appropriate warnings rankings. In this Help file, we provide guidance on how to determine which warnings are critical to the project or your company and then set warnings thresholds. The Help file also provides detailed instructions on how use our Revit plugin to edit and export the rankings, review the warnings threshold, set the standards, and deploy the standards.
     
  • Blog Post: Ideate Explorer: Review Revit Warnings Using Microsoft Power BI (UPDATED)

    This blog post from September 2021 updates a post from June 2021 where we announced the release of a Power BI template that uses warnings data from our Ideate Explorer Revit plugin to help users 1) visualize details of the warnings in their Revit projects, 2) get accurate information about their warnings to BIM 360 users, and 3) create actionable data visualizations that clearly deliver warnings data. In the more recent post, we detailed updates to the Power BI template to align with the latest software developments of Automation for Ideate Explorer. We 1) added an Ideate Automation input script, 2) adjusted slicer filters, 3) added a date slicer, 4) added top 10 warning descriptions, and 5) added warnings over time.  Read the blog post for details.
     
  • Video – The Value of Ideate Explorer + Ideate Warnings Manager to all Revit Users

    In just three minutes, you will gain a solid understanding of how Ideate Warnings Manager fills gaps in the warnings dialog that is built into Revit, as well as the strong value and ROI possible with this critical component of our Revit plugin, Ideate Explorer. Wherever you fall within the architecture, engineering, construction, or building-owner community, you can avoid time consuming and costly downstream problems when you use Warnings Manager to proactively keep your Revit models clean and healthy. Watch the video for more.
     
  • Video Series 

    Failure to manage the warnings in your Revit project can result in poor model performance, slow synchronization times, and/or file corruption. To help Ideate Software customers address specific warnings and to show how simple the workflow is, we developed a series of short videos that demonstrate the steps to take to resolve the warnings using the Warnings Management component of Ideate Explorer. 
     

Learn More about Ideate Software Plugins for Revit

Browse our website to learn more about Ideate Explorer and Ideate Warnings Manager. While there, be sure to check out our other Revit plugin tools, Ideate BIMLink, Ideate StyleManager, Ideate Sticky, and IdeateApps. To learn how customers use our tools to streamline their Revit data management tasks, read some of the stories featured in the Case Studies category of our blog posts. 

Download free trial versions of any product you don’t yet have to experience firsthand how it will help you and your team enhance productivity by working in Revit faster and more accurately. 

Connect with us Through Social Media

Get tips and tricks, product demonstrations, and more on Twitter, LinkedIn, Facebook, and YouTube.

Contact us with Questions

If you have any questions, reach out to us. We are here to help you understand and use our Revit plugin solutions. 

Read More

April

13

2022

Every day, our Ideate Software Support team fields all types of questions from AECO professionals all around the world. You can review some of these recent question and answers via our Ideate Software Support Series blog category.

A nice question that came into our team concerned the ability to quality control dimensions within the Revit model. A customer asked if we could find all the overridden dimensions with one of our Ideate Software plugin solutions for Revit. In fact, we can review overridden dimensions in both Ideate BIMLink and Ideate Explorer.

The tool you choose might be dependent on the ultimate action you would like to take concerning the overridden dimension:

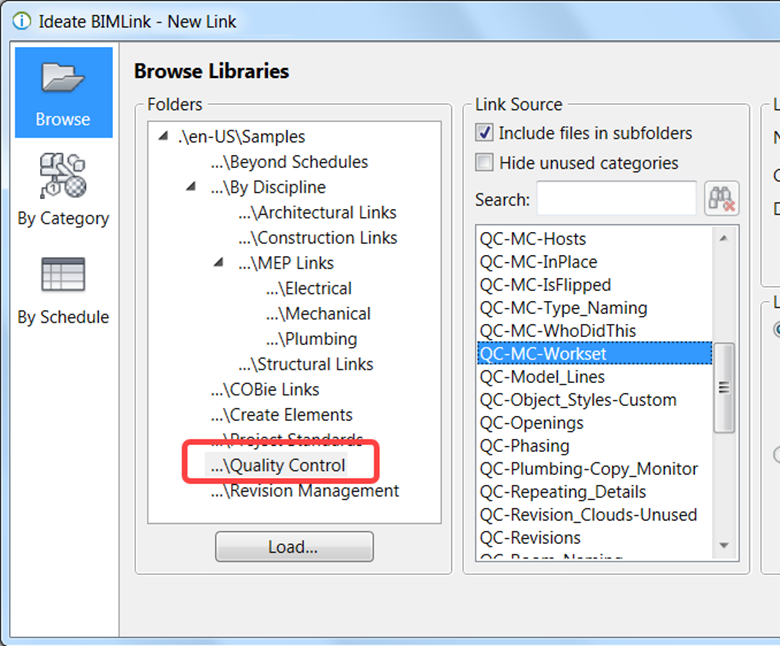
  • Included within Ideate BIMLink, we have a delivered a library link called QC-Dimensions. This link is setup to allow auditing for dimension overrides - this applies to single-segment dimensions only. You can also review and modify the Prefix, Suffix, and Value Override to make changes to a whole series of overridden dimensions.

    override dimensions - Ideate BIMLink plugin for Revit
    The QC-Dimensions library link, located under Quality Control, allows you to manipulate the Value Override, Prefix, and Suffix via Ideate BIMLink.
     
  • If you are looking to completely remove the dimension override, then Ideate Explorer might be the better tool. You can use Ideate Query to first find the overridden dimensions, and then you can double click on each overridden dimension to modify or remove the condition.

    Override Dimensions - Ideate Explorer plugin for Revit
    Select on the Dimension Category within Ideate Explorer and then use Ideate Query to select those dimensions that have been overridden within the model.

    Override Dimensions in Revit
    You can double-click on each Overridden Dimension and then use Revit to toggle back to the actual value.

Please review this online Help topic for the specific steps for using Ideate Query to discover overridden dimensions as well as additional Ideate Query workflow examples.

You can also review this 1-minute video on Cleaning up Text and Dimensions with Ideate Explorer. It’s tip #8 within a detailed list of 10 auditing tips for Ideate Explorer.

Now, overridden dimensions don’t need to be a source of frustration within your Revit model.

Do you have a support question?

Just send an email.

Learn More

Browse our website to learn more. Download a free trial or subscribe today

Stay Connected

Check us out on Twitter, LinkedIn, Facebook, and YouTube.


About the Author

Richard W. Taylor, Associate AIA – Technical Evangelist 
Richard has more than 30 years of experience working for companies that develop architectural and engineering software solutions, such as Intergraph, Bentley, and Autodesk. He has over 20 years of Revit experience, and he was part of the original development of Revit while at Revit Technology Corporation. He worked for 12 years at Autodesk, where he presented, taught, and worked to improve features in Revit. Richard holds both a Bachelor of Science in Architectural Studies and Master of Architecture from the University of Nebraska, Lincoln. As Technical Evangelist, Richard works with AECO clients worldwide, developing and consulting on BIM solutions. Find Richard on Twitter and LinkedIn.


Read More

March

11

2022

Every day, our Ideate Software Support team fields all types of questions from AECO professionals all around the world. You can review some of these recent questions and answers via our Ideate Software Support Series blog category.

Recently, an Ideate Software customer asked us about the seemingly random colors that appear on Revit definitions within the Ideate StyleManager dialog. What do they mean? Definitions, such as Fill Patterns, assigned the same color are considered duplicates. You can more easily understand the color groupings if you select “Isolate Duplicates” as an option before you analyze.

Colors assigned for duplicate definitions with Ideate StyleManager for Revit
Colors will be assigned for duplicate definitions.

Select "Isolate Duplicates" to group and color code duplicates 
Revit elements will be grouped together and color coded together to indicate they are duplicates if the “Isolate Duplicates” option is selected. 

After a quick review of the same color combinations and naming, you may realize that a merge is required. As an example, it’s very easy to see that “diagonal up small” and “Diagonal up-small” are the SAME definitions with just different spelling and capitalization.

Check Duplicate Definitions when merging to limit list to duplicates
By checking the “Duplicate Definitions” option when you are merging, it will limit the available list to just those definitions that are considered duplicates.  This can make merging one definition into another MUCH easier to find.

If you have “Isolate Duplicates” still selected after completing the Merge operation, don’t be surprised that you can’t see your definition listed in the Ideate StyleManager dialog anymore. Since it’s not a duplicate definition anymore, you will have to uncheck that option to see the definition. For instance, you might want to now rename “Diagonal up-small” to something else.

After correcting duplicates, rename to standards

Now that we don’t have any duplicate definitions for Diagonal up-small, we can rename it to standards.

The colors within Ideate StyleManager are a quick way to review duplicate definitions and start to clean up your Revit model to match your company standards.

If you have any comments on how we can improve our user interfaces, please let us know! Just send an email to [email protected].

This post is part of a series of real questions posed to our Support team and our solutions. View more


About the Author

Richard W. Taylor, Associate AIA – Technical Evangelist 
Richard has more than 30 years of experience working for companies that develop architectural and engineering software solutions, such as Intergraph, Bentley, and Autodesk. He has over 20 years of Revit experience, and he was part of the original development of Revit while at Revit Technology Corporation. He worked for 12 years at Autodesk, where he presented, taught, and worked to improve features in Revit. Richard holds both a Bachelor of Science in Architectural Studies and Master of Architecture from the University of Nebraska, Lincoln. As Technical Evangelist, Richard works with AECO clients worldwide, developing and consulting on BIM solutions. Find Richard on Twitter and LinkedIn.

-------------------------------------------------------------------------------------------------------------------------

In case you missed them, here are some other topics covered recently in our Support blog posts:

  1. Valentine Secrets Revealed for the Ideate BIMLink User Interface – Posted February 14, 2022, this article features our response to a customer who asked if Ideate BIMLink for Revit has the ability to apply some minor changes to Revit models without having to send the information to Excel and then import those changes back into the model. It does! In fact, this “inline editing” ability has been available within the Ideate BIMLink user interface for several years. Read the post for step-by-step instructions. 
     
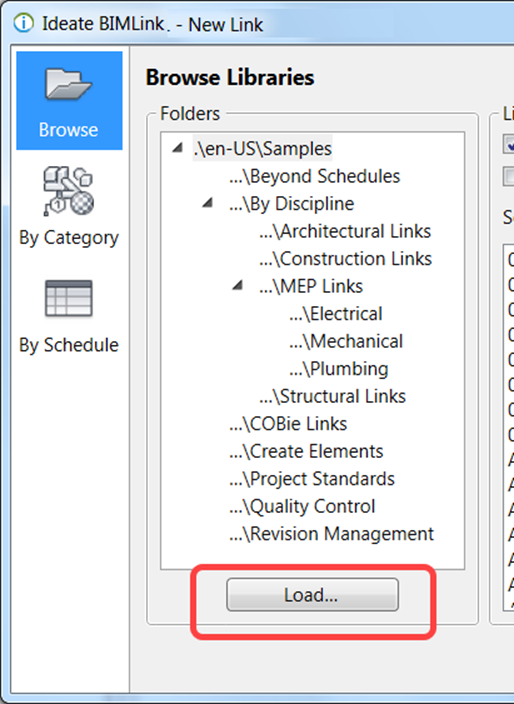
  2. How do I load an existing Ideate BIMLink link definition? – Posted January 20, 2022, this article provides our detailed response to a longtime customer who contacted us about the ability to load an existing link definition, as it used to be available on the primary Ideate BIMLink dialog as a pull-down option. We shared that, in order to streamline the creation of NEW Ideate BIMLink link definitions, we moved the ability to load links under the NEW button. Read more in the article and get more information about loading link definitions via this Ideate BIMLink Help article.  
     
  3. How do I manage Revit health metrics and deploy Revit Warning standards for my company? – Live on our website starting on December 27, 2021, this blog post provides answers to the many customers managing Revit warnings data with Ideate Explorer, one of our Revit addin tool. The post details how to assign rankings to warnings, so you can focus your time on those most critical to your business. Read the related online Help topic, Deploying Warnings Standards to learn how to set up and deploy company standards that related to this Revit model health metric.
     
  4. Using Ideate BIMLink to Type Swap Revit Families While Preserving Instance Parameter Data – Posted on November 29, 2021, this blog post addresses an issue that customers reported: Some parameter data did not transfer when they type swapped old Revit families with newer ones with the same parameter data. We show how using Ideate BIMLink to type swap families and map parameter values to the new families is easier, more accurate, and takes a lot less time. 

Ideate Software is committed to helping customers get a strong return on their investment in our Revit plug-in tools. In addition to blog posts, we have short how-to videos, Help files, and more available 24/7 on our website. Our Support Team is also here to help. 

Stay connected through Twitter, LinkedIn, Facebook and YouTube.

Read More