Managing Workset Assignments for Revit Model Elements Using Ideate BIMLink
For any Revit user who works on workshared-enabled projects, managing the workset assignment for model elements is tedious work. For starters, the settings for the current workset is located at the bottom of the screen in Revit, making it easy to ignore. Since Revit does not use layers and colors (generally speaking) for elements, you may not realize that you are placing model-elements on the incorrect workset. As you place more and more elements on the incorrect workset, you find out that backtracking is time consuming and error prone, especially when you are isolating elements graphically to look for workset anomalies.
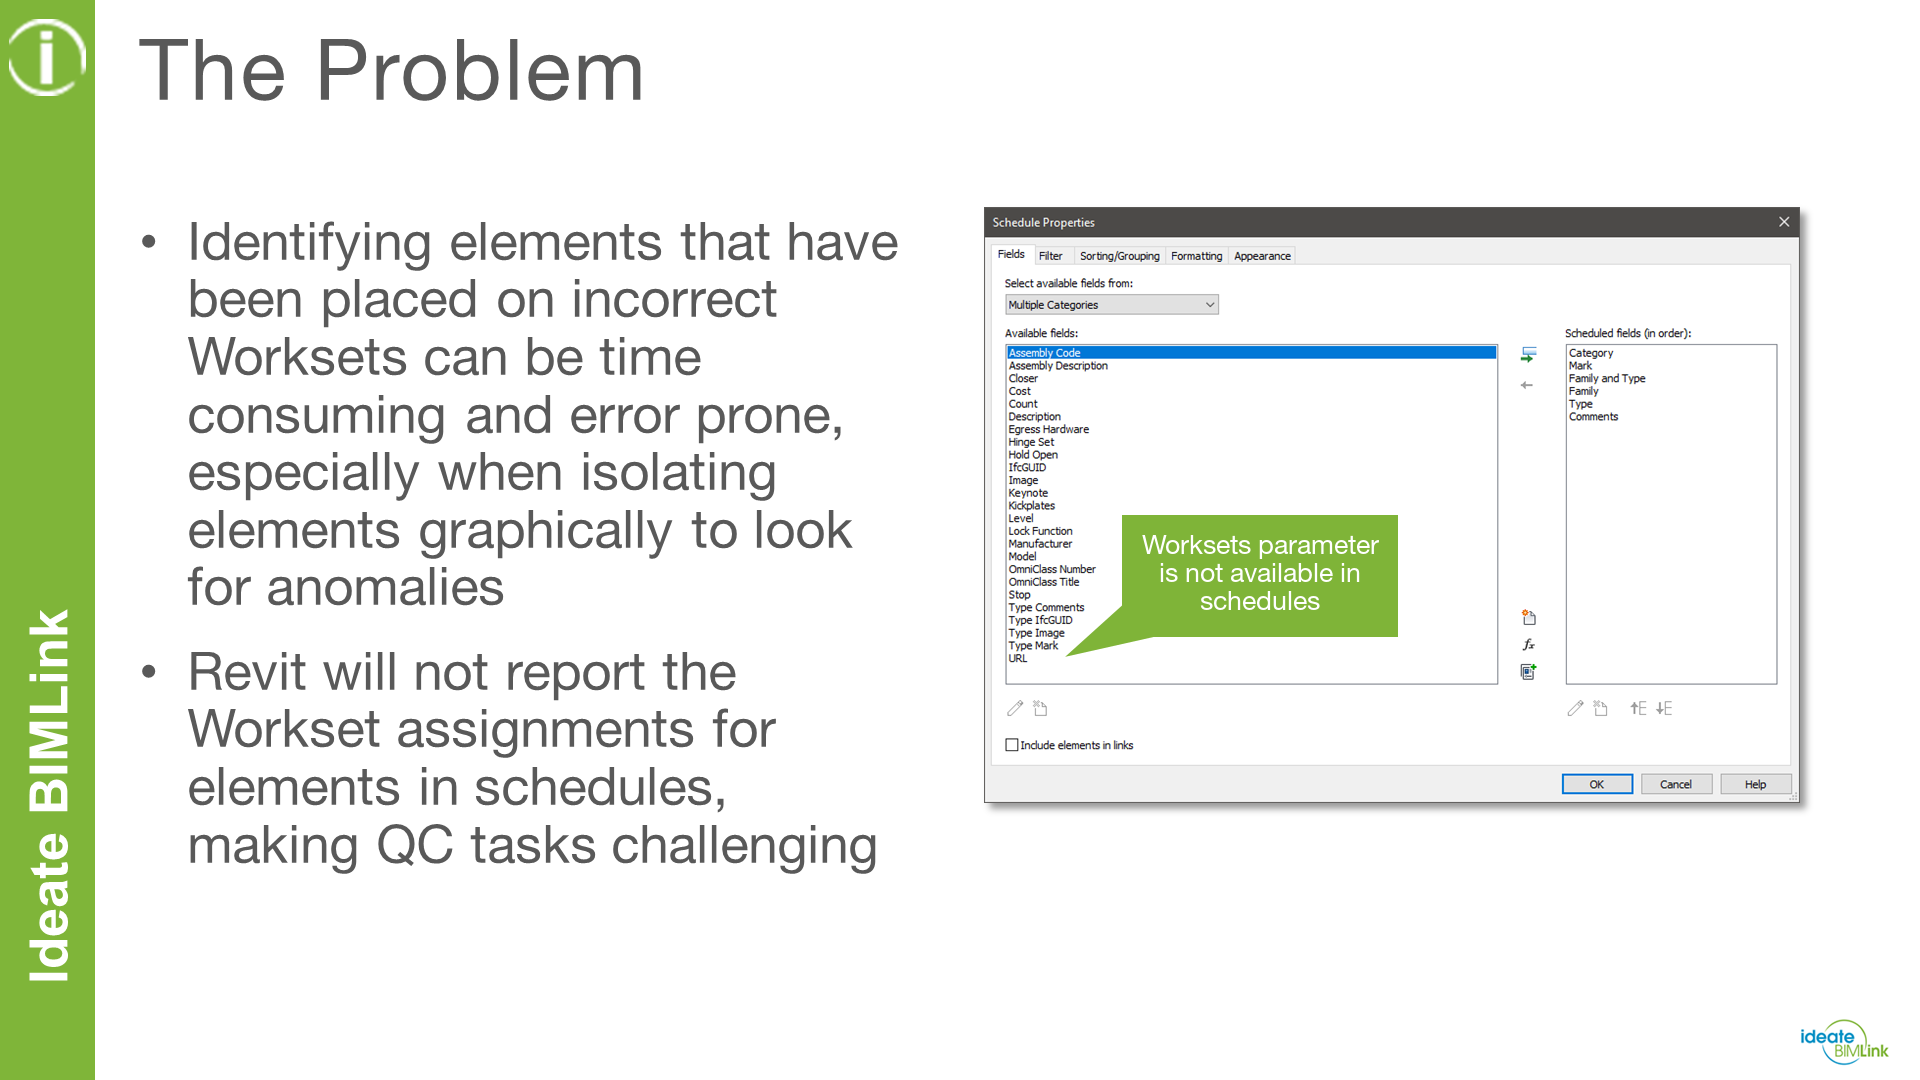
Common Workaround
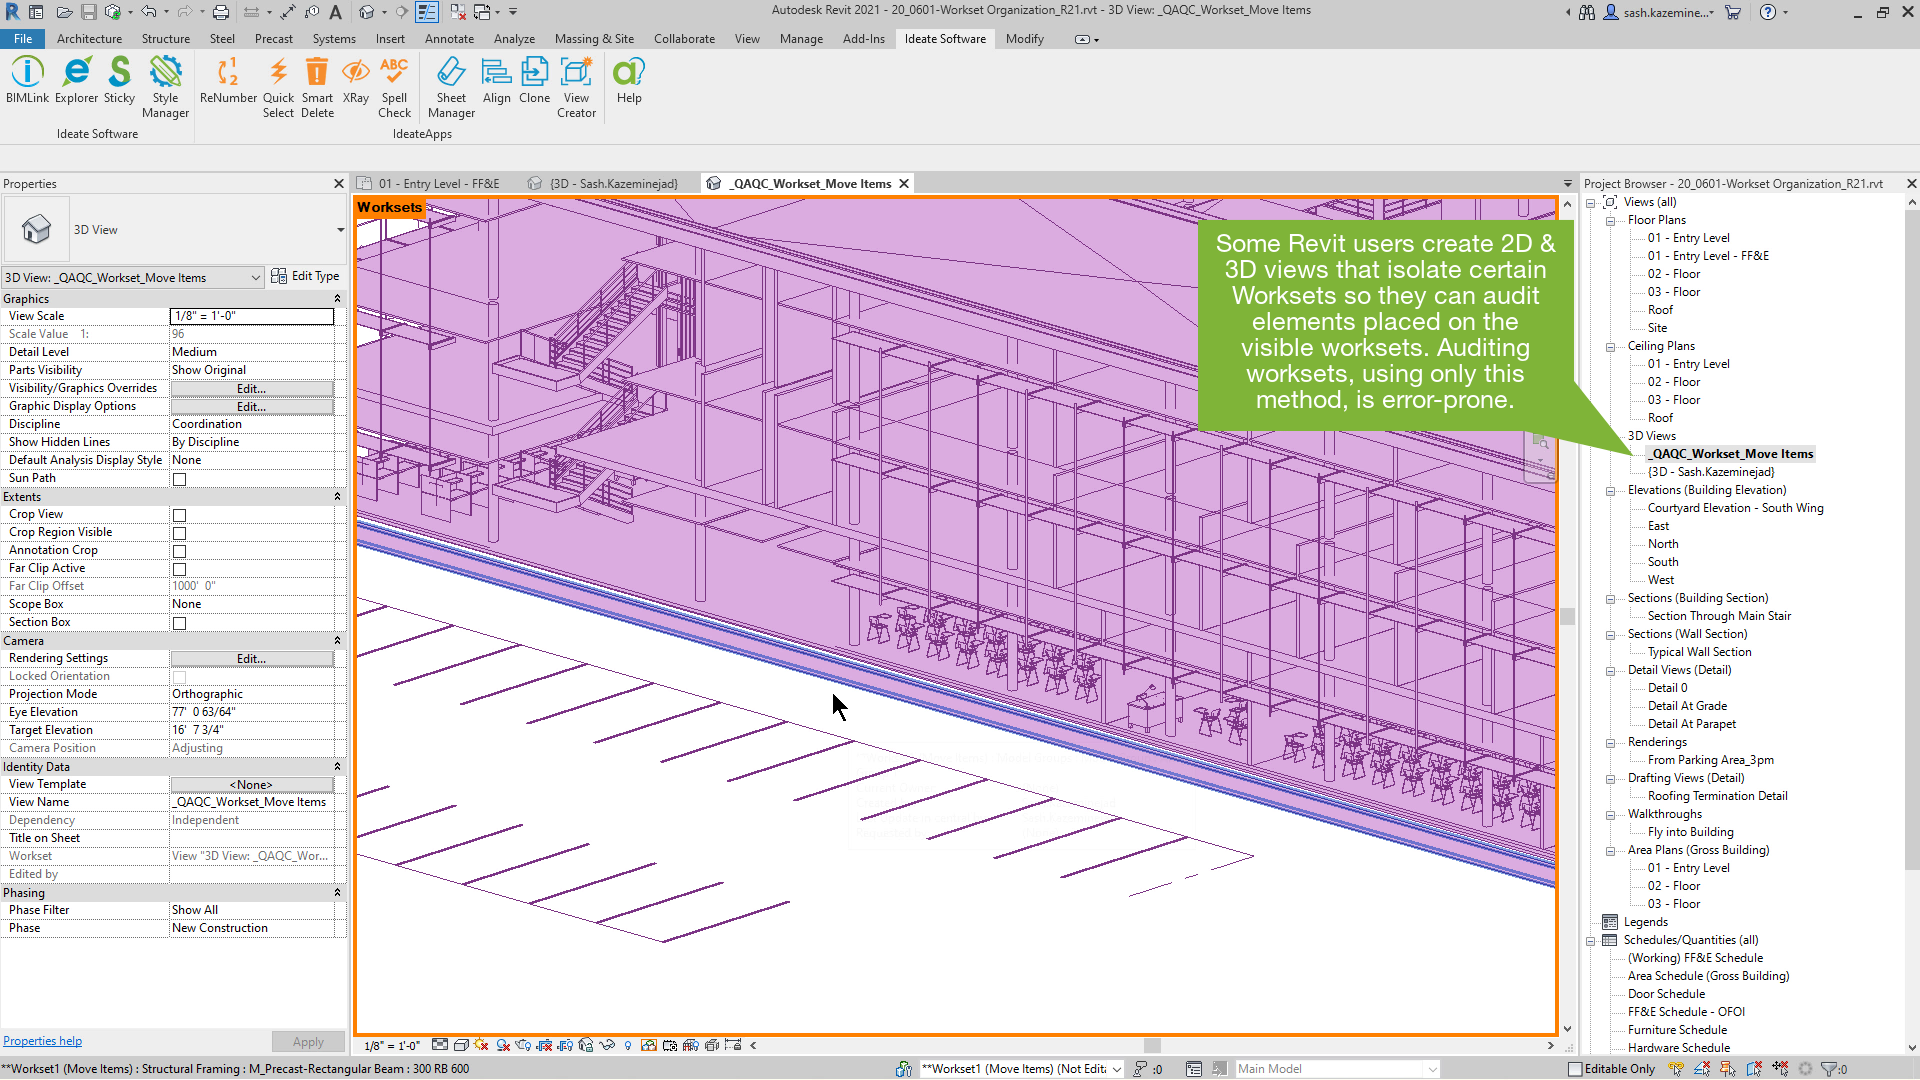
A common workaround to address model elements that have been placed on the incorrect workset is to create a series of 2D and 3D views that only display one workset per view. When reviewing elements in that view, we are looking for model elements that do not belong in that view. This would indicate elements that are on the incorrect workset. For example, if we isolate a workset called FF&E in a 3D view, we are looking for non-FF&E model elements, such as structural floors, mechanical equipment, etc. When we find those elements, we can then select them and move them to their respective workset.
While this method does work for auditing the workset assignment for model-based elements, it may be nearly impossible to see smaller elements, as they tend to get buried within the larger elements. Trying to account for all elements would require many QC views and hours of auditing.
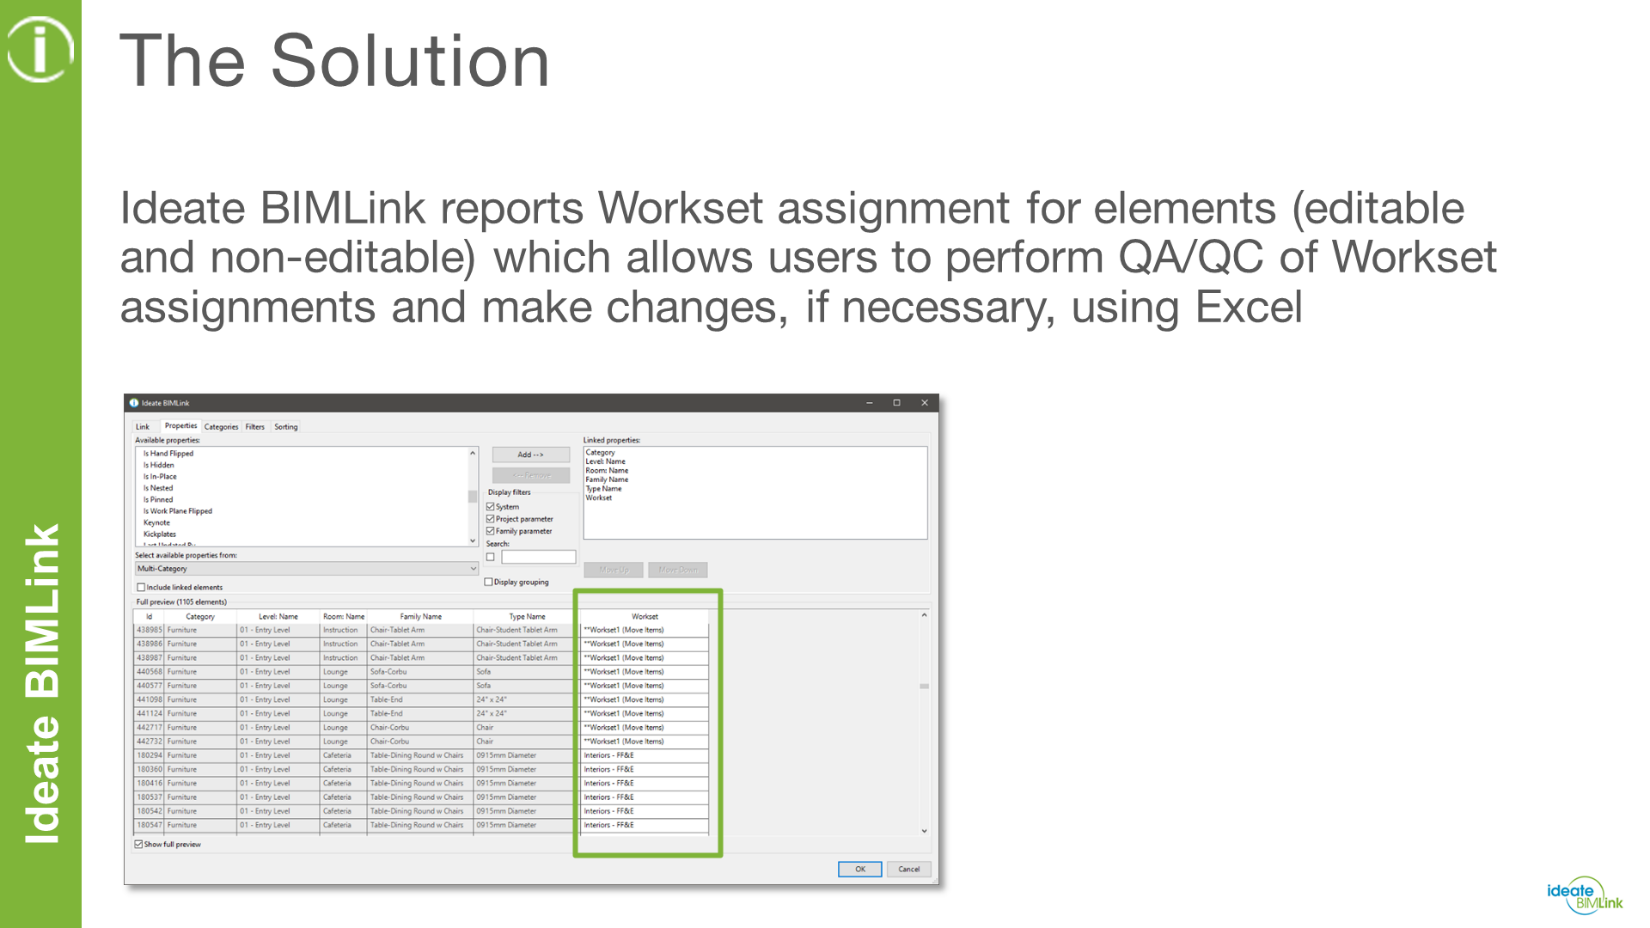
A Better Solution: Use Ideate BIMLink
Thankfully, we have Ideate BIMLink to assist us with this challenge.
Ideate BIMLink reports both editable and non-editable workset assignment for elements, so users can perform QA/QC tasks of workset assignment using Excel. When necessary and applicable, the workset assignment for model elements can be changed in Excel and then pushed back into the Revit model. This process does not require the use of special 2D and 3D views. In this case, all the viewing and editing is done from a data perspective, which is much easier, faster, and more accurate.
Step-by-Step Instructions
The process for this workflow would look something like this:
- In Ideate BIMLink, navigate to the …\Quality Control sub-folder
- Select the link called QC-MC-Workset
- If necessary, under the Properties Tab, add or remove any parameters that will assist you with your QC tasks. For example, you may want to add Level: Name and/or Room: Name so that you can identify the level and room reference for certain elements, if applicable (example: Scope boxes do not have level nor room assignments, but Furniture may have level and room assignments)
- If necessary, under the Categories tab, remove any categories that you wish not to export for quality control and editing purposes
- If necessary, under the Filters Tab, add or remove any filters that will help you export only the data you want to view and edit
- Under the Link tab, verify that Export with dropdown values is checked. This will ensure that you get an accurate export list of project worksets. In addition, it is recommended that if you make any changes to the link definition, give it a new name so that it is not confused with the original link definition that ships with Ideate BIMLink
- Export the data to Excel
- Review the workset assignment for each model element and make all necessary changes
- Import the data using Ideate BIMLink
- Review all changes in the summary windows and then click Import to commit to the changes
It is important to note that while this blog post focuses on changing the workset assignment for model-elements, the process for exporting, reviewing, and changing model data using Ideate BIMLink is essentially the same.
To learn more about this process, be sure to watch this video.
It is also possible to manage worksets with Ideate Explorer. Here are links to our online Help file and a recorded webinar with details:
Explore recent posts


