Ideate BIMLink for Room Finish Schedules
One of the best places to get started with learning Ideate BIMLink is a Room Finish Schedule.
If your Revit project has more than 30 rooms and more than four (data-input) columns, using Ideate BIMLink can significantly reduce the time it takes to review and edit your room data by allowing your edits to happen within Excel. The sheer volume of data makes this Revit task unwieldy. Despite the addition of “Freeze Header,” Revit still has a long way to go to achieve the ease-of-use found within Excel.
When you export your Room Finish data to Excel via Ideate BIMLink, you get these benefits:
- Fantastic editing functions within Excel! Today I’ll highlight three of my favorites.
- Format as Table
- Autofill
- Find and Replace
- More control of the Room Phase and Design Option properties
- Unlike Revit, Ideate BIMLink data exports do not limit the room list to one specified phase or design option
- Being able to edit all Room data across multiple phases at once will save you time in your complex projects
- As this blog series continues, we will explore these and other powerful uses of Ideate BIMLink
- Most importantly, you can hand off the Excel file generated via Ideate BIMLink to anyone on the project team for editing, regardless of their Revit skill set.
The example I’m using here is based on the Snowdon Towers Sample Architectural model that comes with Revit 2024. Everything shown here is supported as far back as Revit 2021 at the time of this post. All the Scheduled fields shown in the Schedule Properties in our example are built-in Revit parameters.
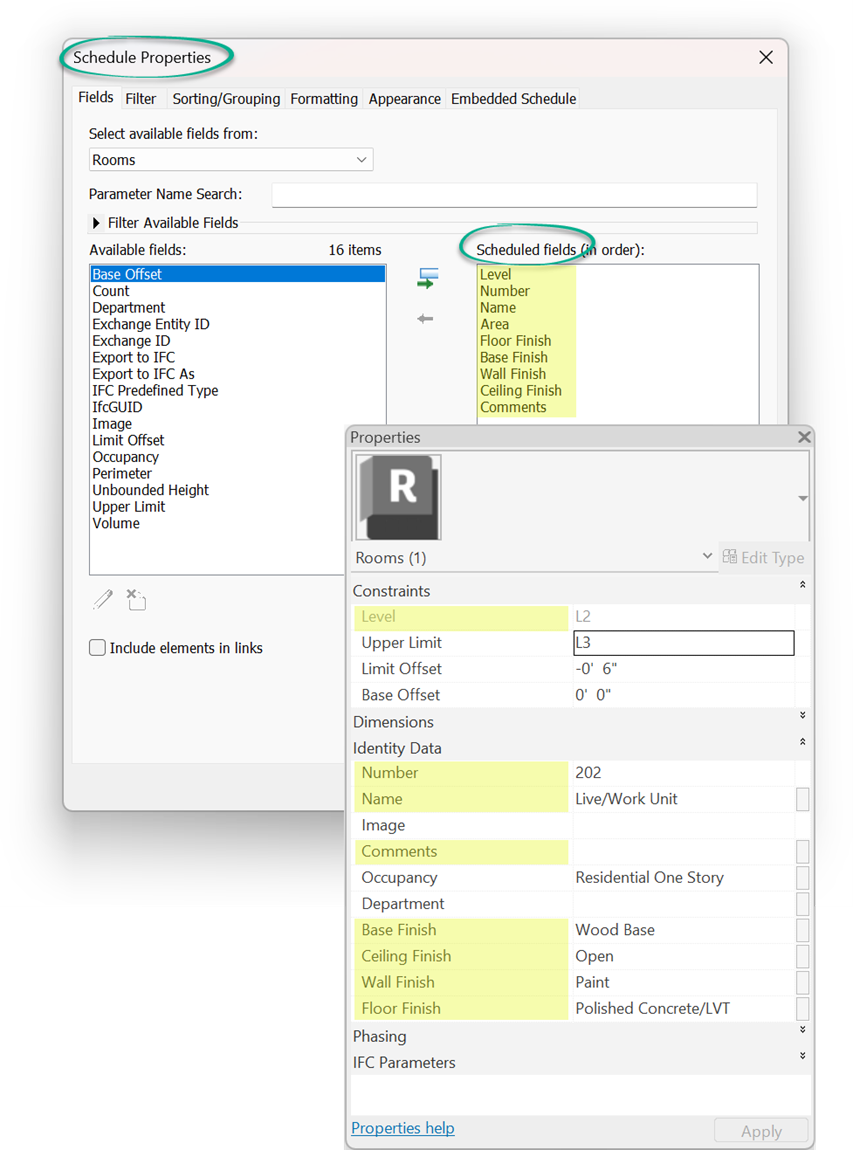
Here’s a cropped example of the Room Finish Schedule as viewed in Revit.
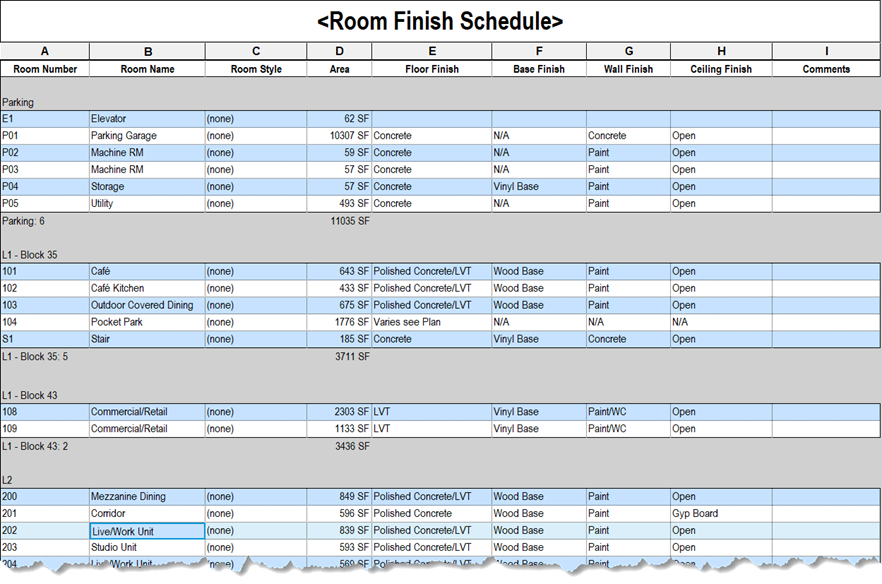
Now let’s get this information out to Excel!
There are three methods for creating links with Ideate BIMLink. We’re going to use what I think is the easiest, Create from Schedule.
Simply open Ideate BIMLink, choose “New,” then “Create from Schedule” where you can browse or search for the Room Finish Schedule, and the click “Next.”
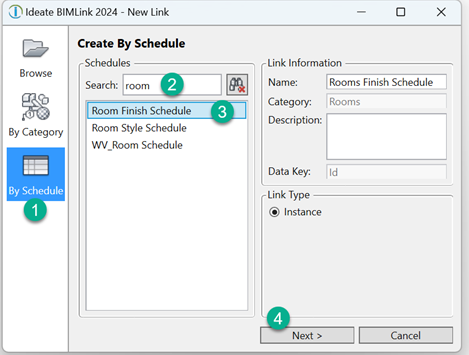
After reviewing the Link Properties, pick “Done.” You’ll be returned to the Ideate BIMLink home screen where you select the newly created Link and click “Export” to save and open it in Excel.
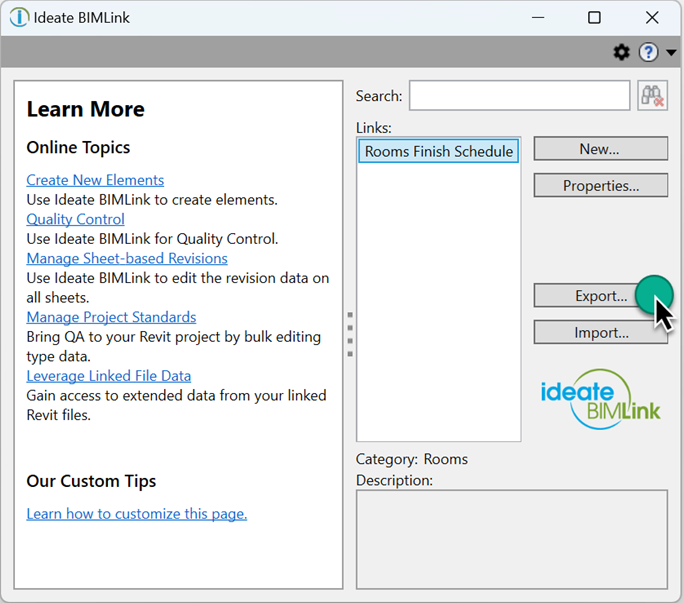
Now that the Excel file is open, let’s have a look at my favorite editing features.
Format as Table
This one click is the most powerful thing you can do to any Excel file that has been exported from Ideate BIMLink.
With cell A1 as the default selection when Room Finish Schedule.xlsx is opened, pick Format as Table from the Styles Tab in Excel to give your table headers (parameters) drop down-functionality!
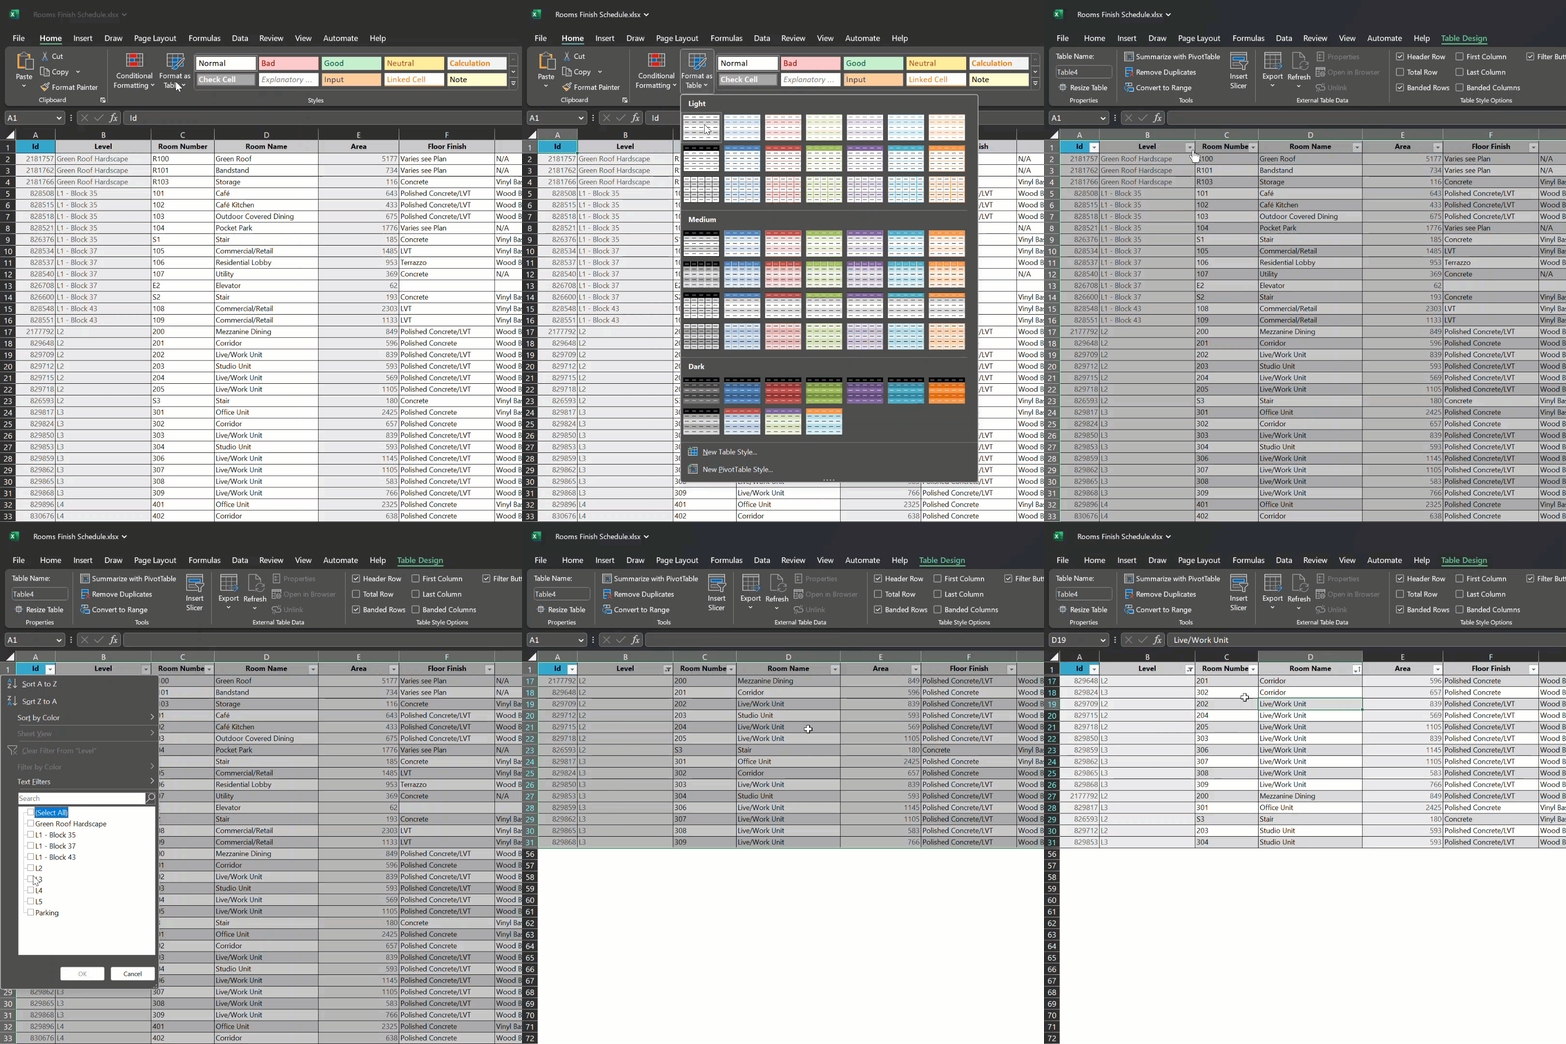
The ability to filter and sort parameter values is nearly endless. Good luck getting a Revit Schedule to work like this!
Autofill
Revit typically limits us from editing more than one value at a time in a Schedule View. Once in Excel, use Autofill options to easily copy multiples and sequences up and down columns with ease.
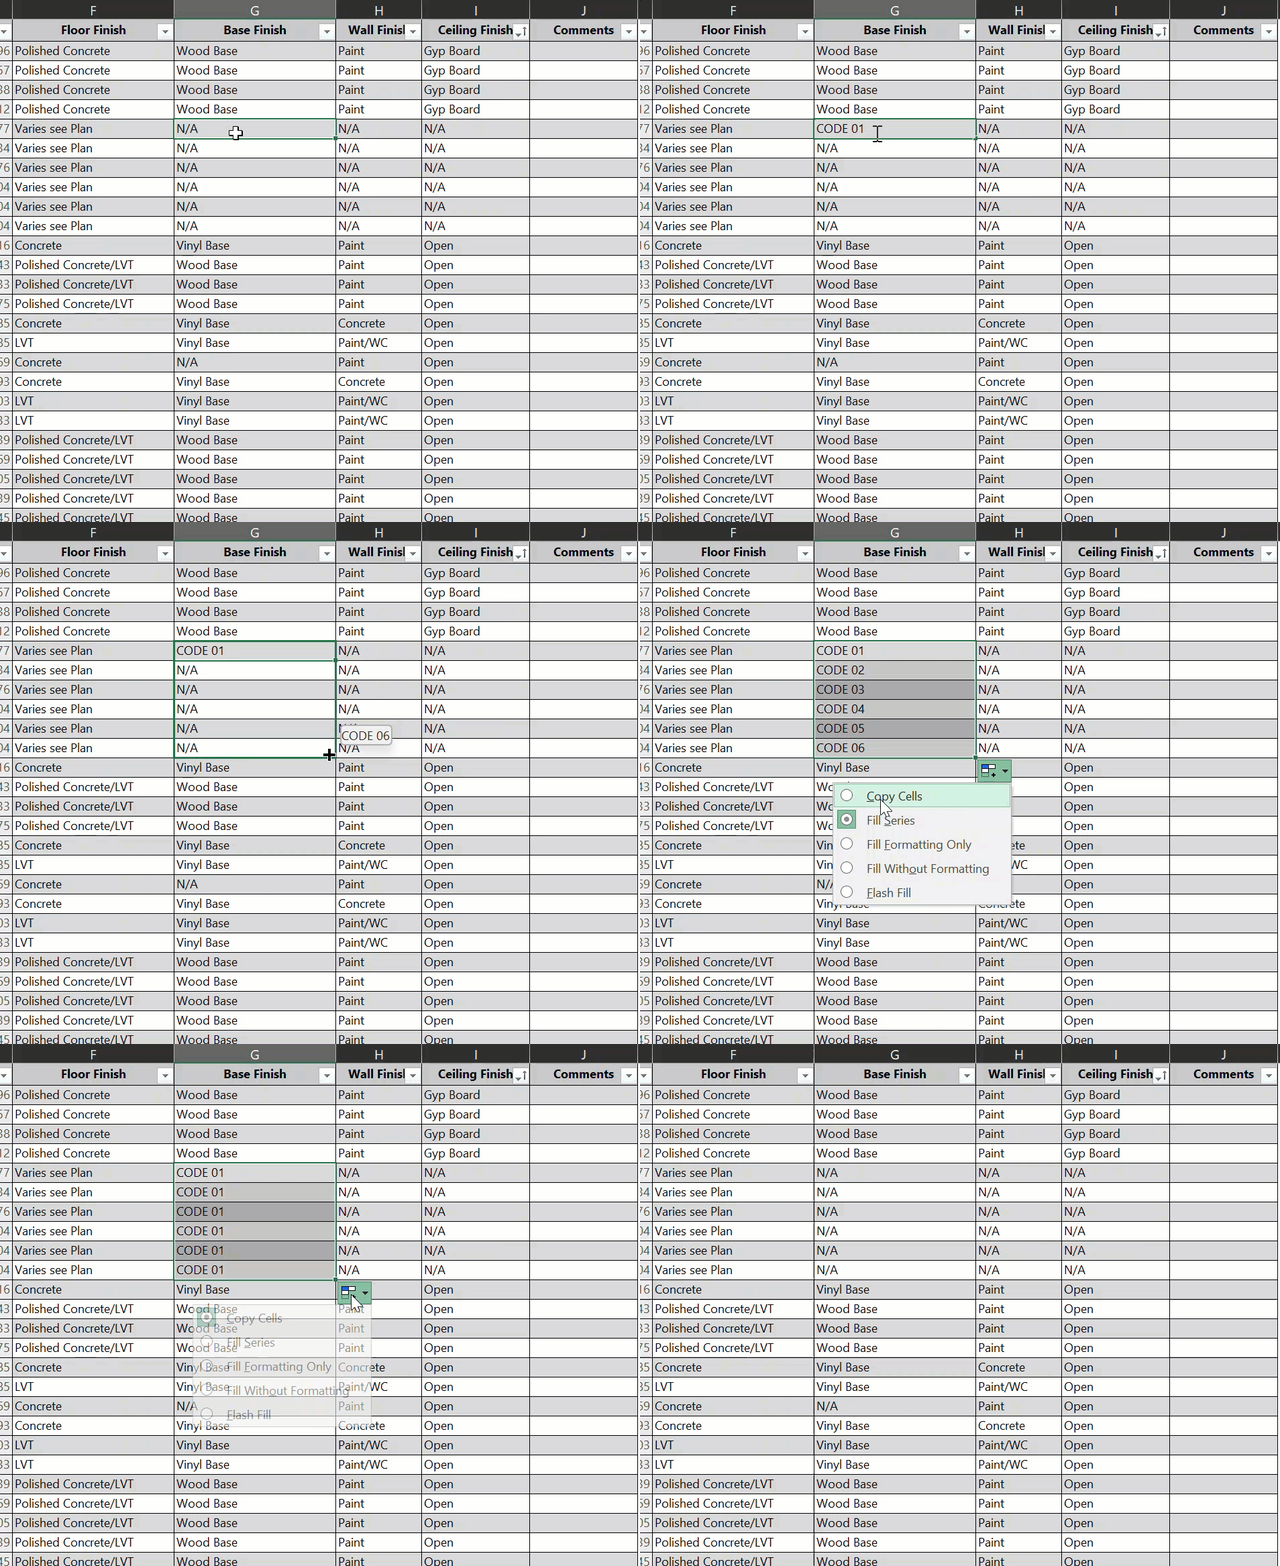
While Autofill is super helpful, be aware that it won’t work if you have applied a filter to any of the column headers. A perfect example of that would be in the previous step where we filtered the Levels column to show only L2 and L3.
Find and Replace
When it comes to making wholesale changes for issues like typos or in this case, changes to a finish that affects many rooms, Find and Replace is your friend.
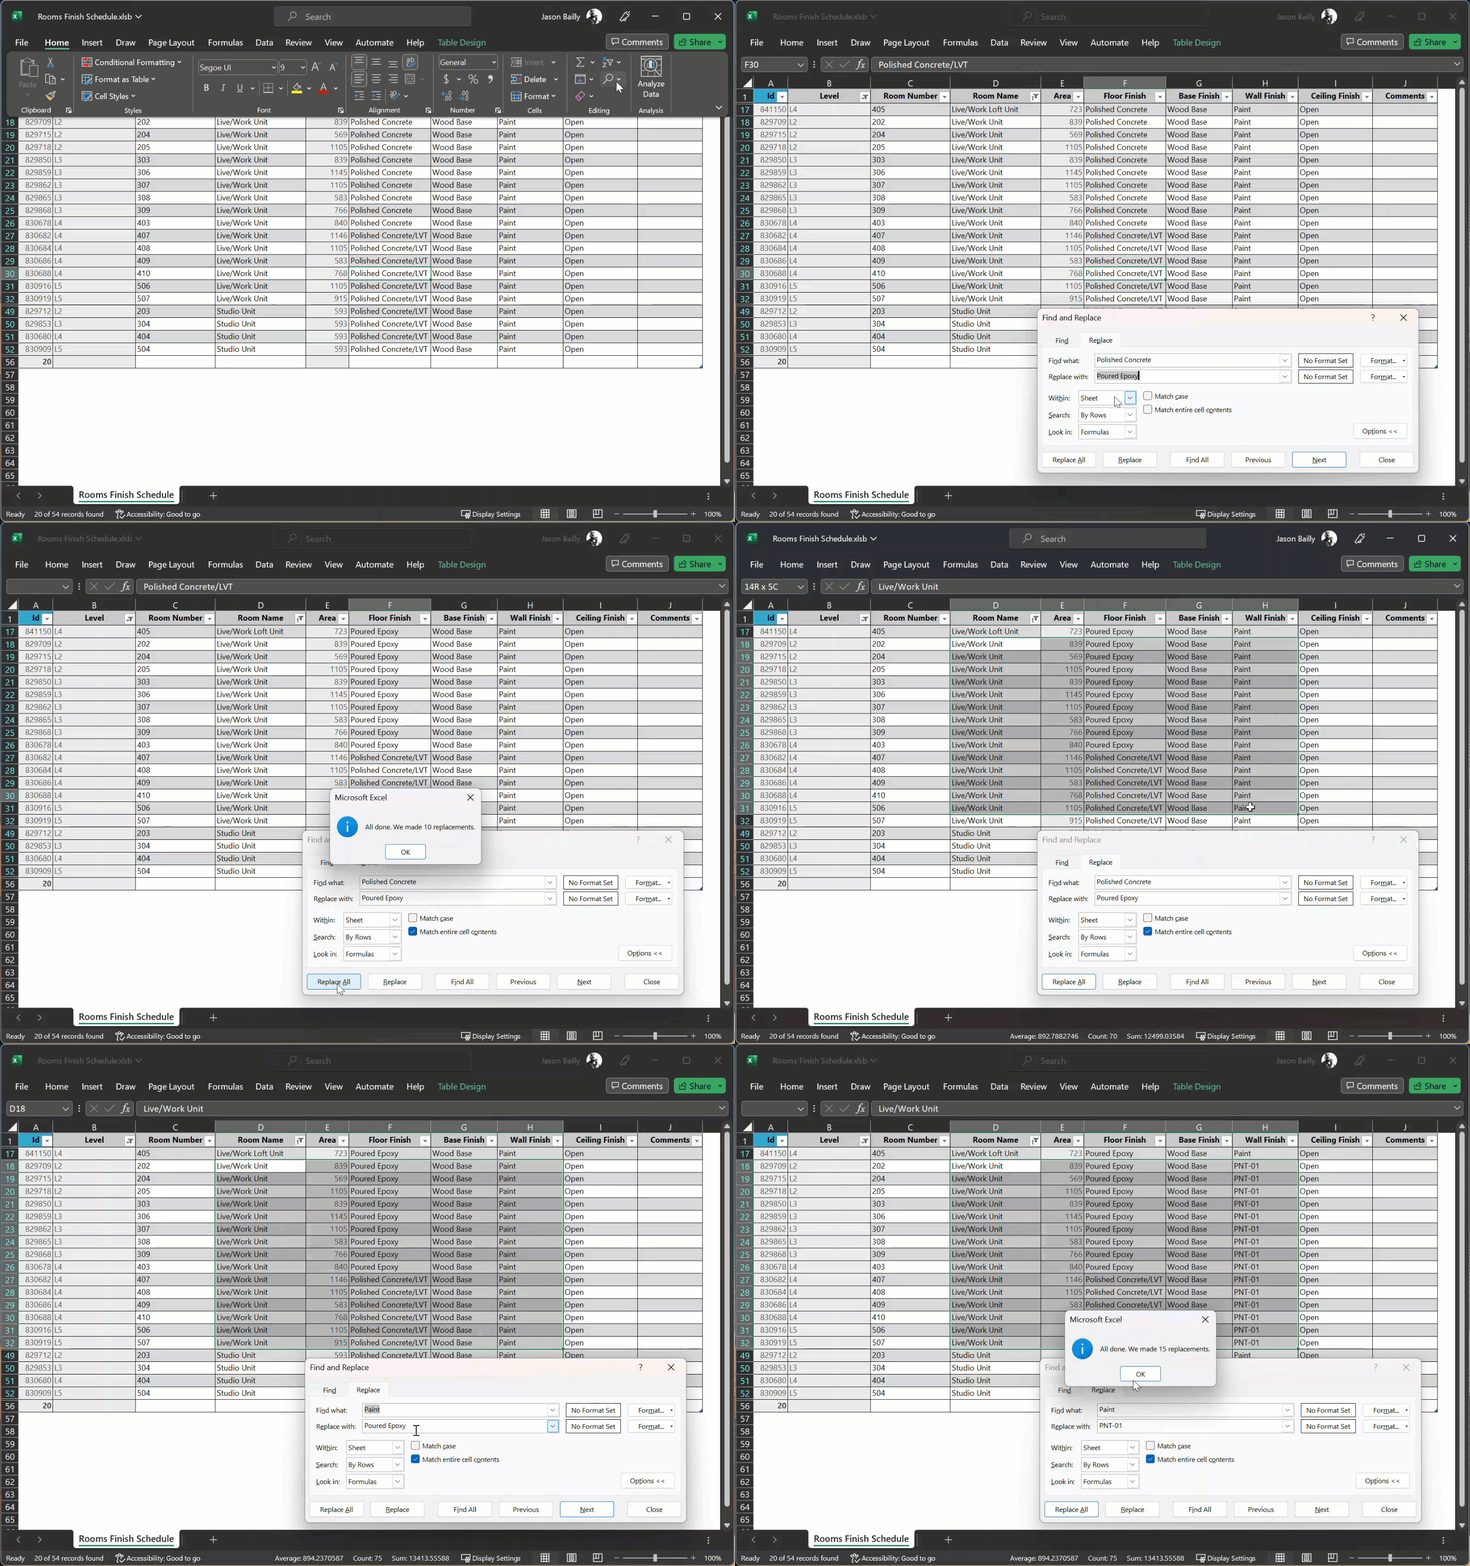
Make sure to expand the ‘Options’ when using Find and Replace to get the most benefit.
We recommend that all Revit users have access to Ideate BIMLink to expedite the review and editing of Revit schedules and Room Finish Schedules are a great place to start. You can download a trial version of Ideate BIMLink and try for yourself.
Explore recent posts
