How Do I Change Imported Line Styles with Ideate Software Tools?
Every day, our Ideate Software Support team fields all types of questions from AECO professionals all around the world. A recent customer request came into our queue that asked about the ability of Ideate StyleManager to modify the color property of a CAD Import element:
“We have several imported [CAD] details from our façade consultants that require color to be edited to prevent an imported hatch from creating a large black area on our drawings.”
Revit manages CAD Imports as Object Styles unless they are exploded, in which case they become Line Styles. In the customer’s case, the CAD Import was not exploded, so Ideate StyleManager could absolutely be used to analyze, merge or delete these styles. However, the goal was to batch edit the colors of these object styles without exploding the CAD Import.
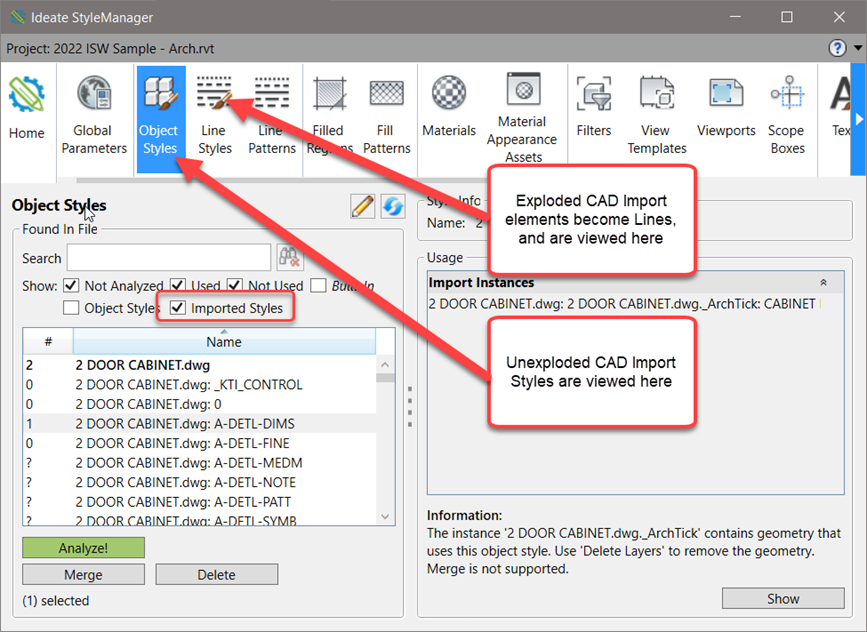
In this specific case, our support team advised that Ideate BIMLink would be a better fit for the requested task. Even though this customer was specifically asking about Ideate StyleManager, they have access to the full Ideate Software suite. When you have access to the Suite of Solutions from Ideate Software, you can use the best tool for the workflow or task.
Step-by-Step Instructions
To edit the color, line weight or material of Revit Object Styles:
- Launch Ideate BIMLink
- Select New
- Pick the Category option at left
- type 'object' in the search box to find Object Styles
- Pick the sample link called
"Project_Stds-Object_Styles"

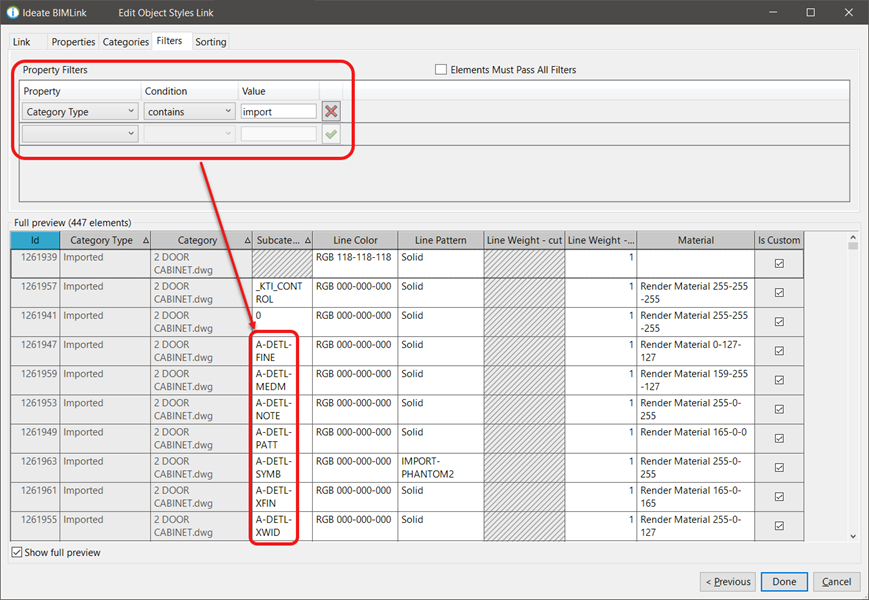
6. Optionally, you can limit the export to only edit the CAD Import Styles by setting the Link Definition Filter as shown:
7. Export to Excel
8. In Excel, change the line colors and patterns as needed
9. Import back into Revit using Ideate BIMLink
In this specific example, the combination of using both Ideate StyleManager and Ideate BIMLink was an excellent solution that delighted this customer.
“Wow, awesome workflow!
This is what I was looking for. Very easy to access all the properties there.
Thank you!”
It’s a good idea to review other Project Standards samples via the Ideate BIMLink library definitions by reviewing this online Help topic.
Let us know how you use Ideate Software solutions to create the most consistent project standards for your Revit models. We love to hear from our customers about how they are using our Ideate Software solutions to solve difficult and time-consuming Revit workflows.
Explore recent posts


