Editing Stickies in Revit
Ideate Sticky combines the ease and flexibility of Excel, Word, and PDF editing with the convenience of a sticky note. With it, users elegantly “stick” documents with non-BIM data onto Revit projects. The “Stickies” appear in the list of Revit schedules within a project and can be edited in the sheets on which they have been placed or on the schedule views themselves.
Edit the Revit Schedule Graphic from the Sheet
A Sticky is a schedule header for a schedule with a single column. In the sheet view, resize the schedule graphic element by grabbing the single grip edit of this column. Revit controls how the schedule header columns are redistributed during a grip edit. In most cases, edits made in the schedule view will produce better results than edits made on the sheet.
IMPORTANT: Changes to the schedule graphic size will be overwritten if the Sticky is manually updated or set to auto-update.
Edit the Schedule View
As a schedule header, the Sticky can be edited with any Revit tools available. Possible edits include resizing columns and rows, merging cells, adding shading and borders, and adjusting fonts. Learn more by reading Autodesk's online Revit Help topic related to Modifying Schedules.
IMPORTANT:
- Changes to the schedule view size will be overwritten if the Sticky is manually updated or set to auto-update. The first time after the schedule view is opened and there is an attempt to edit, Ideate Sticky will deliver a warning indicating that Ideate Sticky is managing the schedule.
- Revit displays text wrapping differently in schedule view and the sheet view. We recommend that text wrap issues be handled n Excel.
Adding Rows or Columns to the Schedule Header
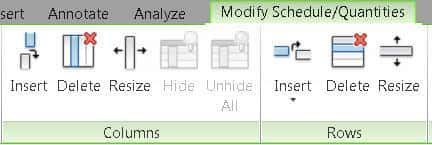
Modifying Cell Properties Within the Schedule Header
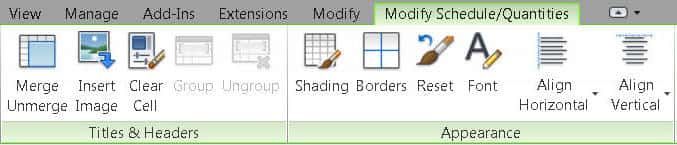
Setting Lineweights
Lineweights and the colors of borders and gridlines are managed in Revit via two custom line styles. Learn more: Editing in Excel for Revit Modeling with Ideate Sticky.
Explore recent posts


