Ideate Explorer: Auditing Worksets
It’s a Revit best practice to place new elements on the correct worksets as defined by the BIM Manager or Revit Standards team. Failure to do so could result in model mismanagement and visibility issues. However, when we are very busy working on our models, we tend to forget to set the current workset. As we place instances of Revit elements, those instances may end up on the incorrect workset. Over time, this issue can compound, making the auditing and correction of these elements difficult and time consuming.
Since we are mostly concerned with model-based components (as opposed to drafting components and view-based elements) being placed on the correct Worksets, we tend to create QA/QC views that isolate model elements by their workset. For example, let’s say we have Plan views and/or 3D views that isolate elements by a workset called Mech-Equipment. When reviewing these views, we can visually look at elements in these views to see if any model-based elements look out of place. Perhaps we get lucky and see a lighting fixture or a plumbing fixture that does not belong to the Mech-Equipment Workset. If we see those elements, we can select them and move them to the appropriate Workset. While this sounds somewhat easy, how does one handle the smaller elements, such as a duplex outlet or a fire sprinkler? What if they are buried deep within the model? Perhaps we need many Plan Views and 3D Views for Workset QA/QC. Even with all these views, we are guaranteed to miss elements, which could prove to be costly.
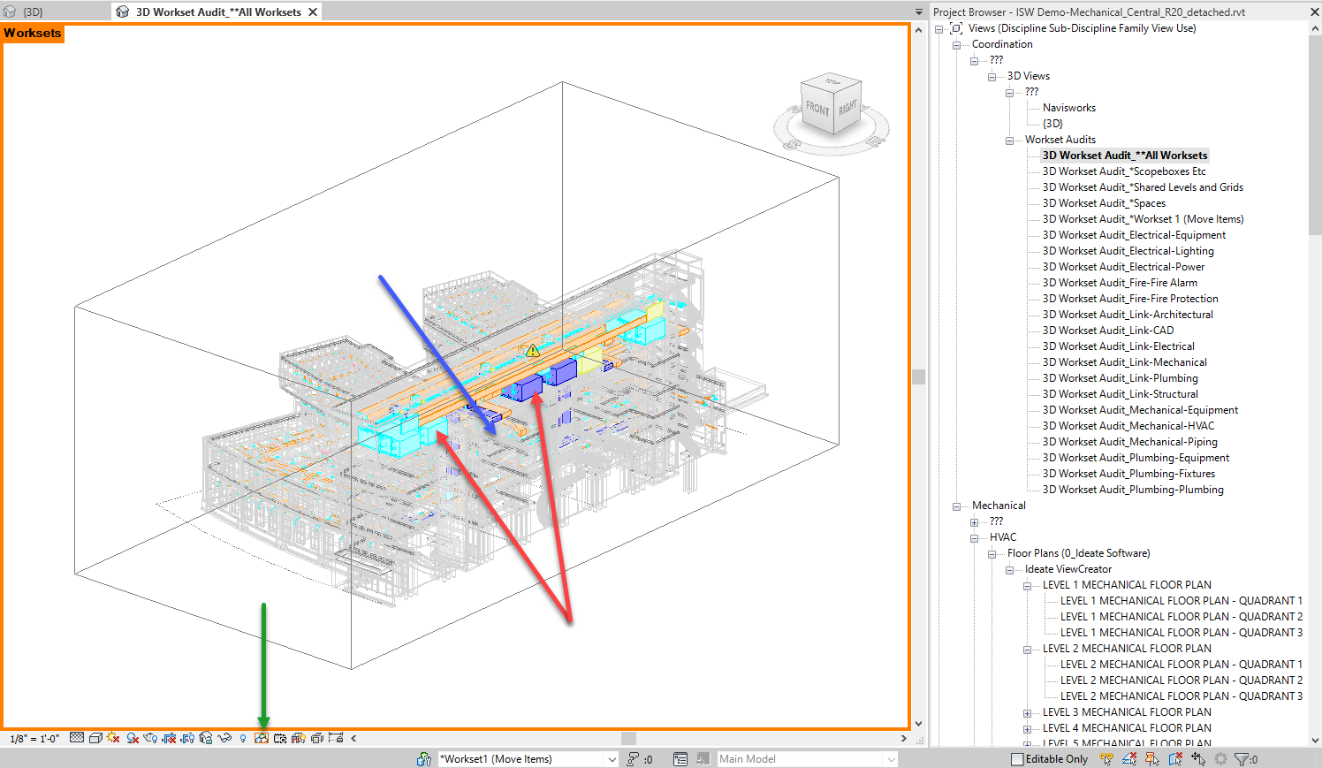
Here is an example of using a 3D view a filter for Worksets and the Worksharing Display (green arrow) enabled. While some elements and their Worksets are obvious (red arrows), some items may be very difficult to see (purple arrow) due to their sizes and how far buried they are within the model.
Luckily for us, we can use Ideate Explorer and the power of Ideate Query to easily refine our selections and move elements to the correct Worksets without the need for QA/QC views, since Ideate Explorer lists all elements and their Worksets in list form. Having the QA/QC views is a bonus, since you can isolate views by Workset and even use the Worksharing Display option in the View Control Bar.
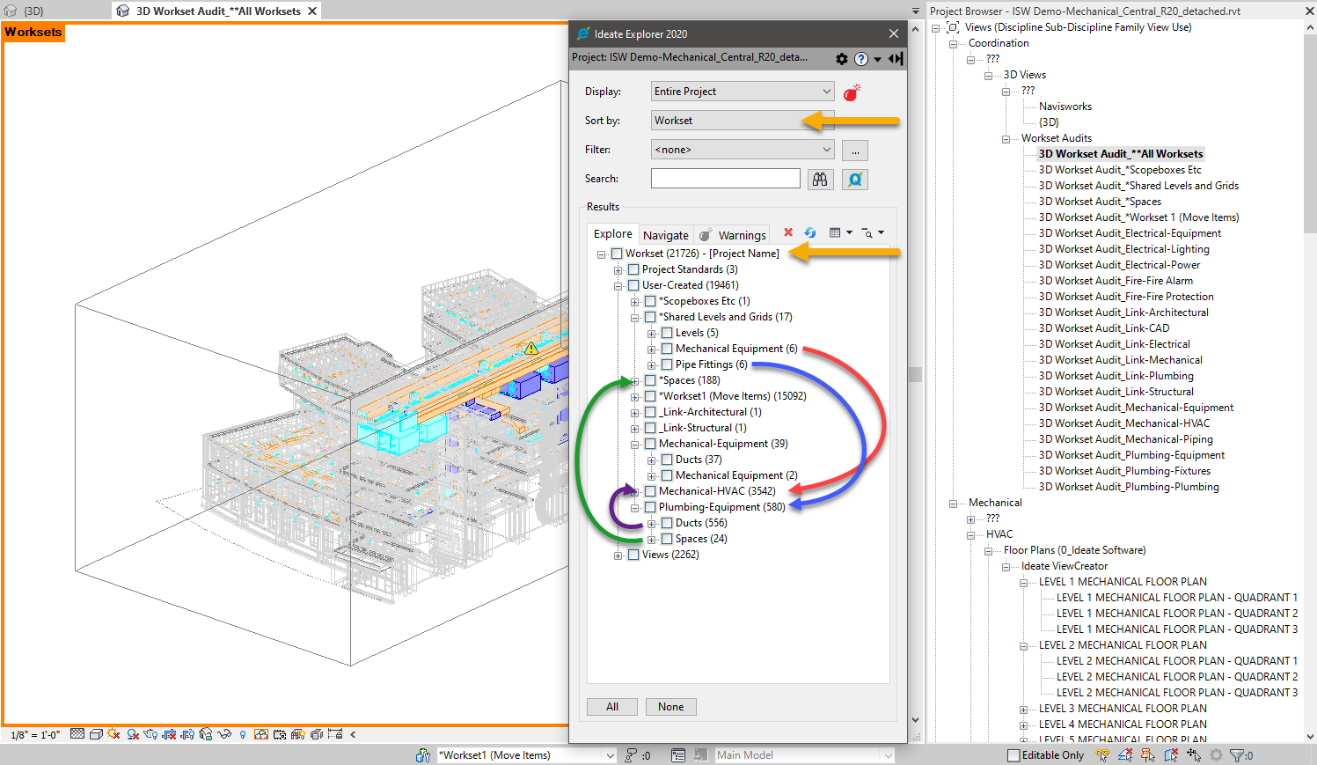
The image below shows how easy it is to identify elements and their current Workset assignment by changing the Sort by: to Workset (orange arrows) and then reviewing the categories that fall under the user-created worksets. In this example, some Mechanical Equipment (red arrow) and Pipe Fittings (blue arrow) elements were found under the Shared Levels and Grids Workset and need to be moved to their respective Worksets. Regardless of which views these elements are in or their size, Ideate Explorer makes it very easy to identify Workset assignment.
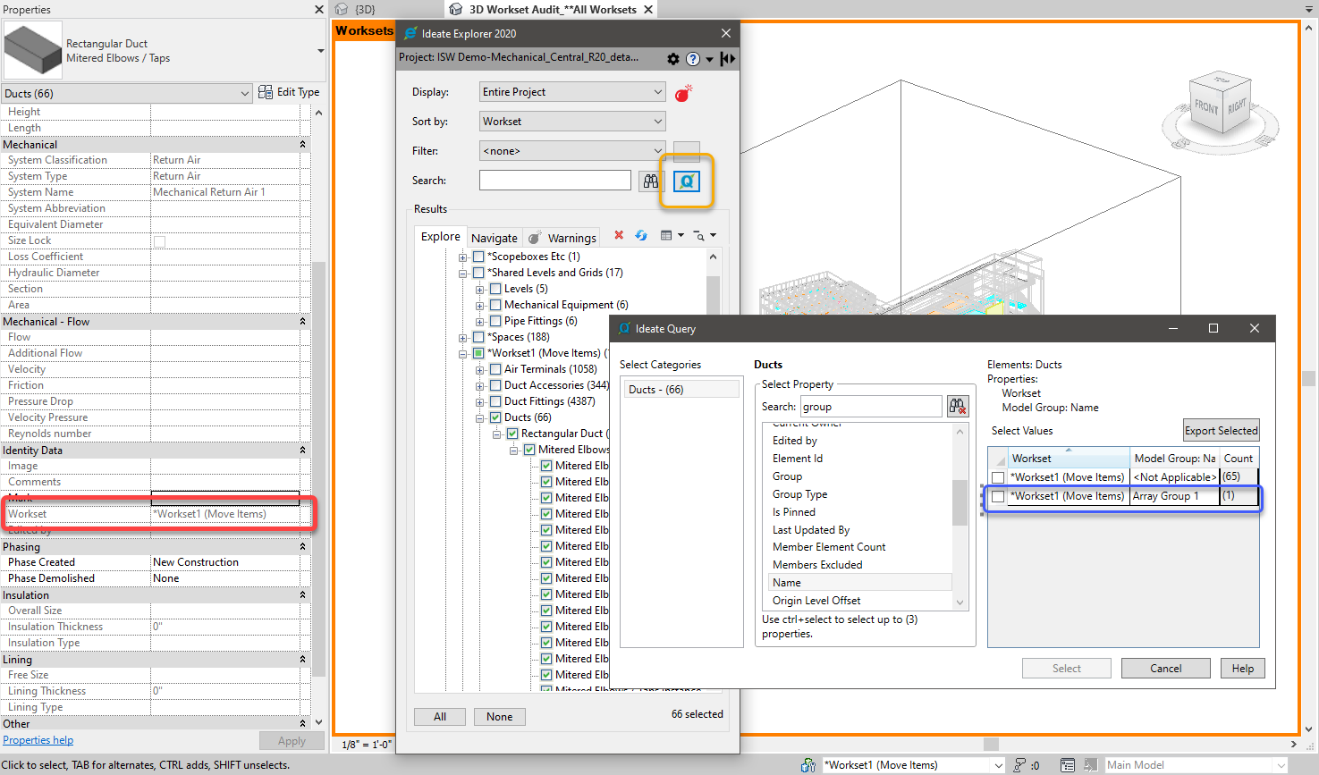
Once elements are selected to move to the correct Workset, it is as simple as swapping their Workset out from the Properties palette. If you find that the Workset selection option is grayed out, as seen below (red outline), be sure to select the Ideate Query button (yellow outline) and then Query the selection based on Model Group Name and/or Is Nested parameter to see if any of the selected elements are part of a group or nested family. If they are, de-select those elements and then verify that you can change the Workset in the Properties palette.
As stated earlier, it is a best practice to place new elements on the correct worksets. Failure to do so will result in model mismanagement and visibility issues. As we place instances of Revit elements on the incorrect workset, this issue can compound, making the auditing and correction of these elements difficult, let alone time consuming. Ideate Explorer can help correct these issues quickly and accurately so that you can be certain of your BIM data.
Ideate Explorer is an amazing Revit data discovery and manipulation tool. It is used daily to do simple selections of elements, all the way to detailed selection refinement and workset and Revit warnings management. Without Ideate Explorer, managing the Revit model becomes complex and tedious.
For more information on using Ideate Explorer to Audit Revit Worksets, be sure to view this 30-minute recording on this process.
Explore recent posts


