How to Invoke the Wizard of Ideate XRay!
Revit allows a dizzying array of sophisticated options to display or hide elements within the building information model. Every model manager knows about Visibility Graphics and Reveal Hidden Elements, but layer on top of that Phasing, View Filters, Linked Files and/or Scope Boxes and things start to get complicated.
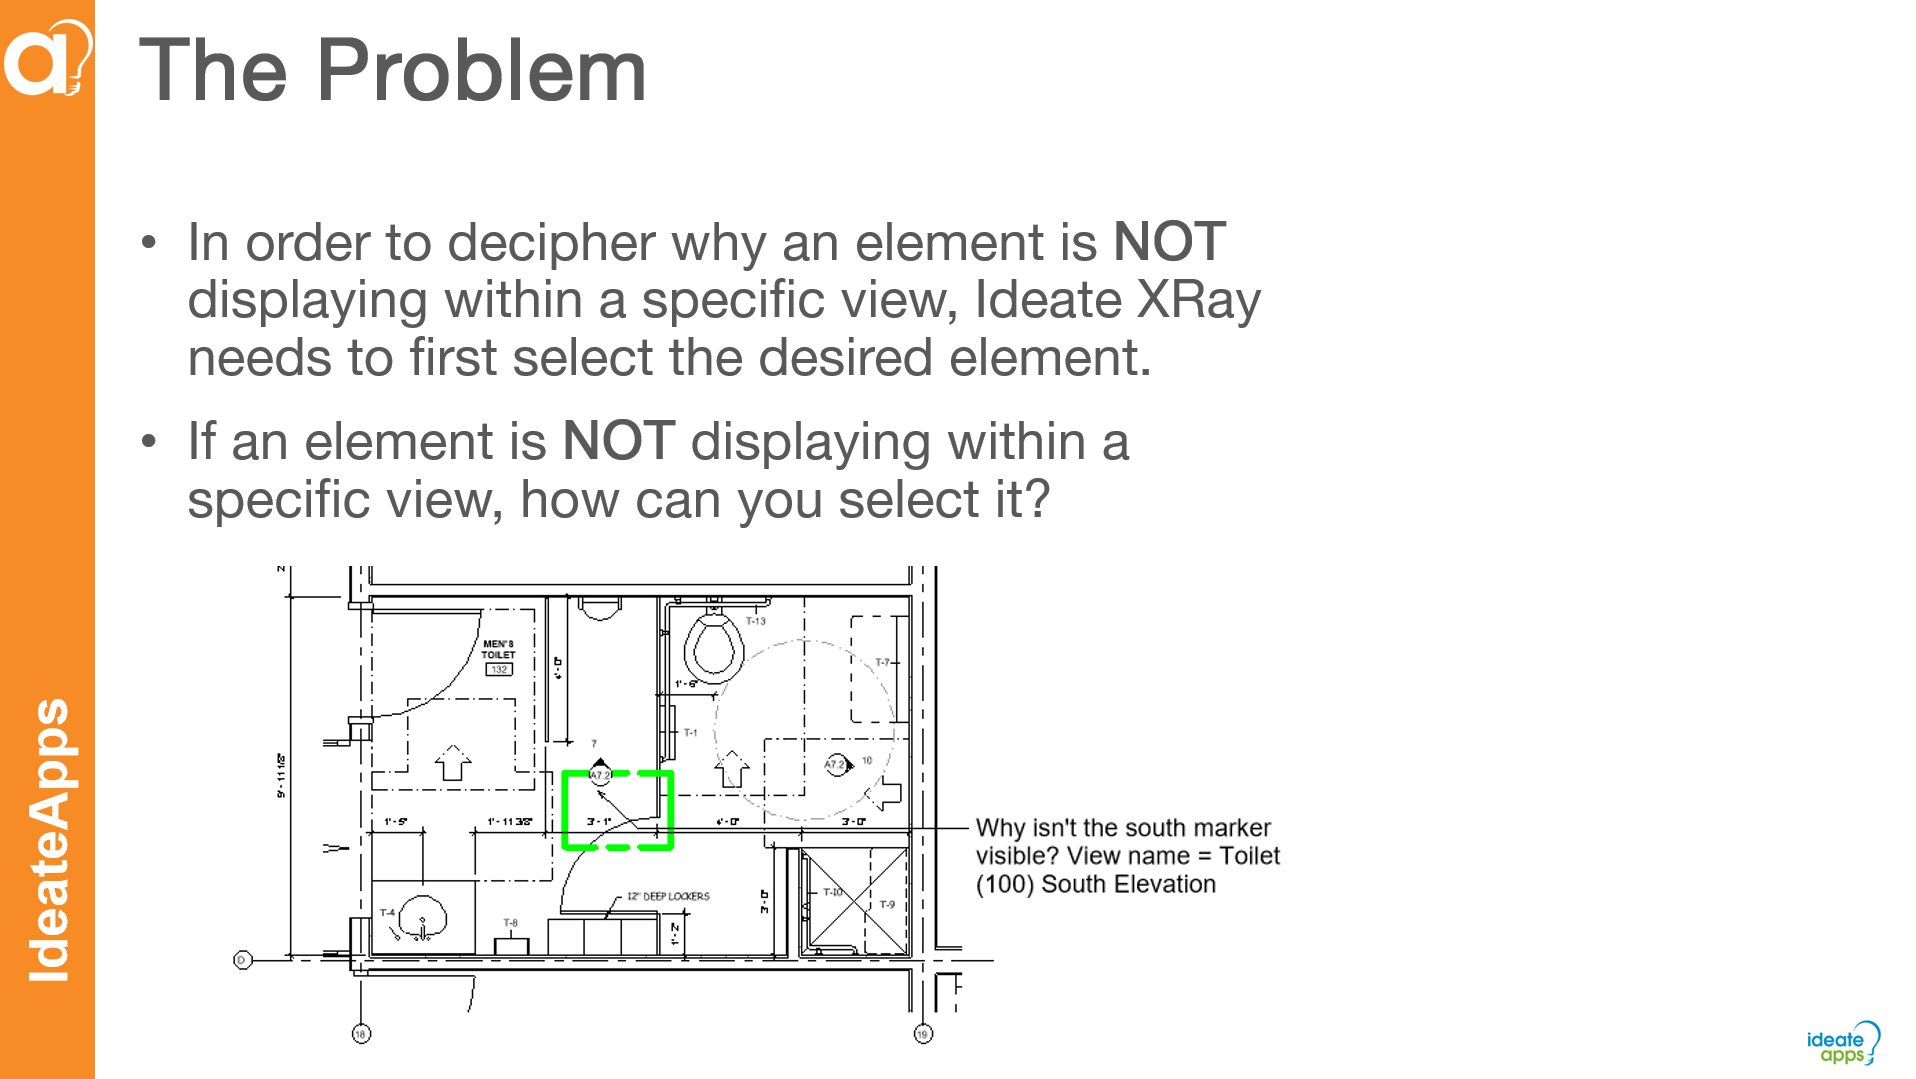
Now add in the fact that you have new staff that might just ignore work set definitions or decide to make a new level because they can’t find the one they want in the elevation, and you’re headed for a Revit Visibility Evil Spell that can baffle the most seasoned Revit warrior on their quest for the perfect documentation! Before you even begin to understand the specific visibility issue, how do you select the element if you can’t see it?
You need a magical wizard. Well, it just so happens that Ideate XRay, part of the IdeateApps collection, has a powerful wizard to help even the most desperate Revit Muggle.
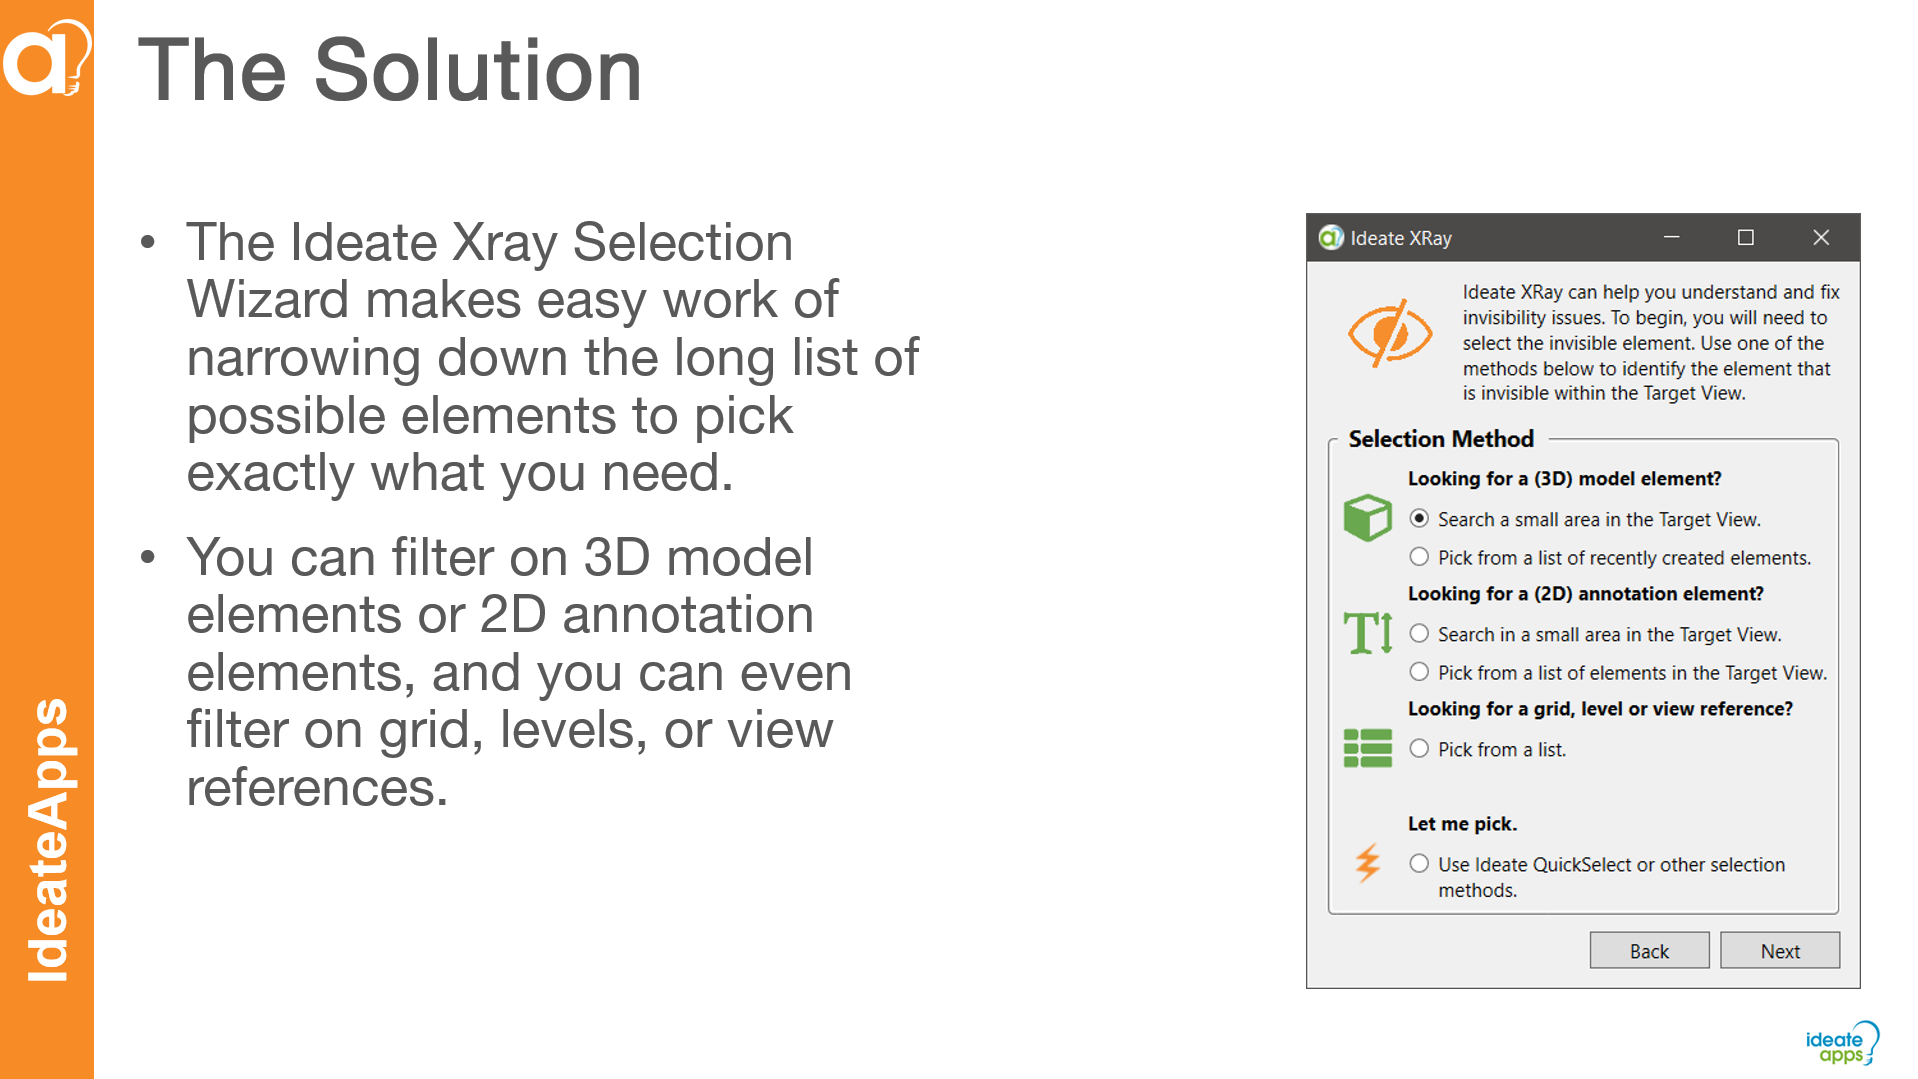
Ideate XRay comes with a powerful Selection Wizard that helps you filter both visible and invisible elements within a view in order to easily select the element you need to diagnose. After selecting the element via the Ideate XRay Selection Wizard, you can use the powerful diagnostic tools within Ideate XRay to review and fix visibility issues while continuing to interact with any Revit command while Ideate XRay is open and at your fingertips.

The Ideate XRay Selection Wizard will appear by default if nothing is selected within Revit when you choose to initiate Ideate XRay, however you can always access the Ideate XRay Selection Wizard from the main Ideate XRay dialog:
- Open Ideate XRay from the IdeateApps ribbon panel
- Choose your Ideate XRay Selection Wizard method
- Select the element you are looking for, depending on the method
- Make sure the target view is set to the view in which you wish to find the element
- Choose the Find Element button on the main dialog
- Review the information from Ideate XRay
- Choose Show Me, Fix, or More Options as possible selections
- Using Revit, initiate the proper commands to fix the visibility issue
Please read our online Help topic about the Ideate XRay Selection Wizard, and you also review the full online Help topics on using Ideate XRay for Revit.
To learn more about this process and to see quick examples of all four selection methods within the Ideate XRay Selection Wizard, be sure to watch this short video:
For a more in-depth recent presentation on Ideate XRay and all the features, please watch this recording.
Explore recent posts


