
Place Viewports on Sheets with Ideate BIMLink
In a previous Training series blog post, I showed you how easy it is to create new plan views using Ideate BIMLink.
In this post, I will show you how to place viewports onto a sheet using Ideate BIMLink.
Using one of the 300+ pre-loaded link definitions, select the 03 Viewports-Create_New.
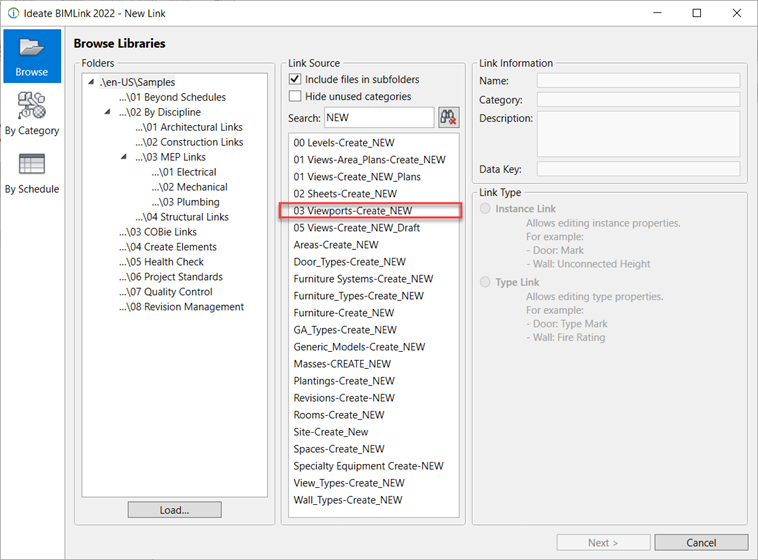
The link definition contains data such as the view name, sheet number, coordinate point and viewport title data.
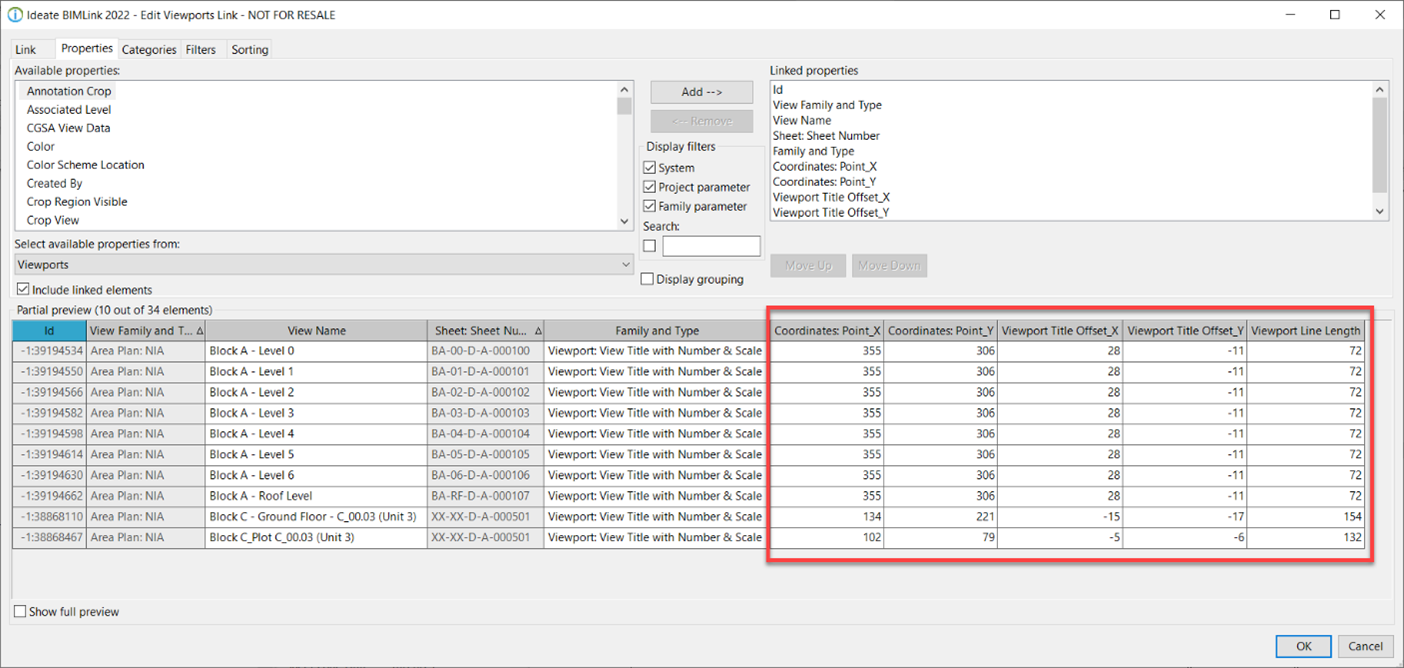
In Microsoft Excel, fill out the information of the viewports you wish to create (e.g., the view name and sheet number you wish the view to be placed on). You can use the coordinate data to place the viewport and the viewport title. If you are creating views similar to existing ones, you can copy the existing coordinate data.
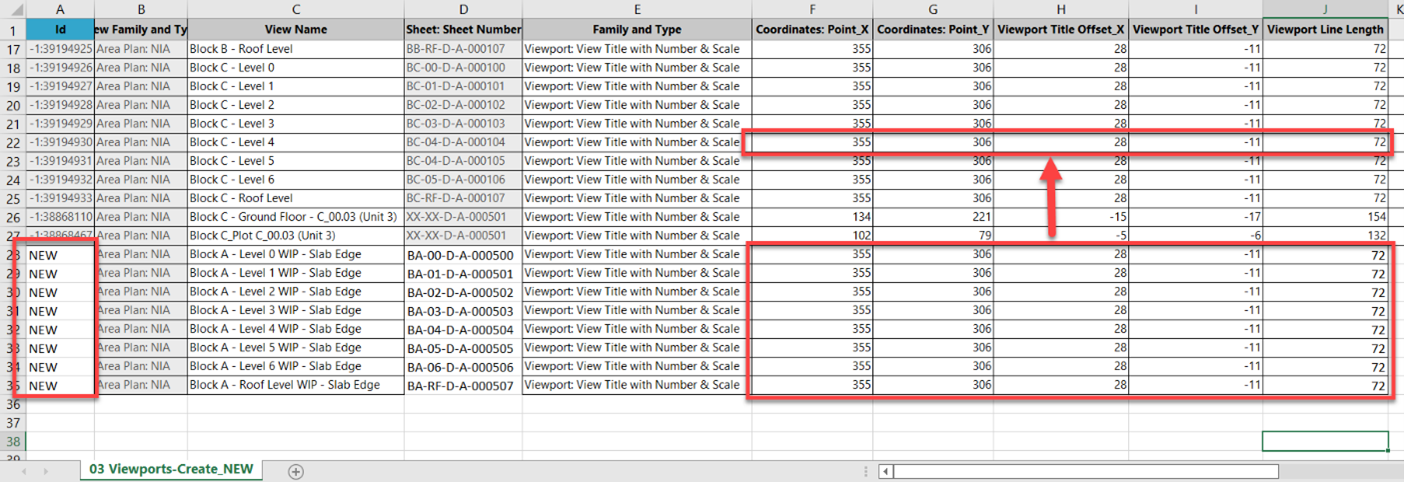
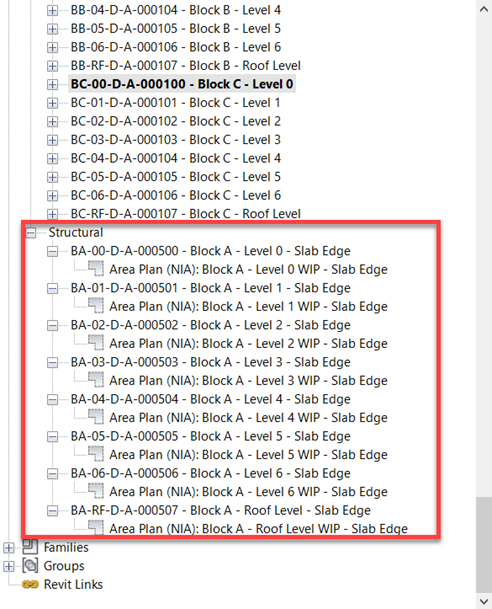
When importing back into Revit, the viewports are created, and the views are placed onto the sheets.
Using Ideate BIMLink, you can quickly bulk create views, viewports and sheets and place the views onto the sheets. Creating sets of drawings in Revit has never been so easy. Refer to the Set Up Projects Help topic for additional information and a short video on this process.
Explore recent posts