Using Ideate XRay to Crop Annotative Elements
Ideate XRay solves for 50+ visibility issues. This tool, which is part of the IdeateApps collection:
- Analyzes the properties of the selected problem view and the properties of the missing element to determine the causes
- Provides a low-risk fix where applicable
- Delivers detailed information about the cause of problem.
Here’s an example of the type of results Ideate XRay provides when solving for a missing Revit annotation element:
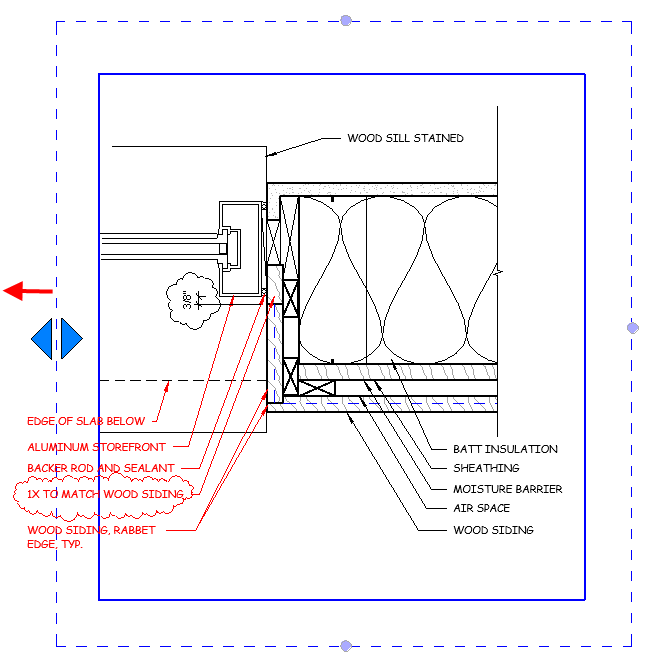
The primary purpose of the annotation crop in Ideate XRay is to support dependent views where the annotative elements live in the parent view, are displayed in the dependent view, and need to be cropped, particularly near a matchline. By default, it is turned on in any dependent view and within any callout view.
Use the annotation crop area to crop tags, text, dimensions, and other annotative elements separately from the model crop region. To edit the annotation crop boundary:
- Within the Properties palette, check these boxes:
- Crop View
- Crop Region Visible
- Annotation Crop
- Within the view, select the Crop Region. The Annotation Crop Region will also be visible as a secondary, dashed boundary as shown in the image below.
- Use the grips to stretch the Annotation boundary as needed
Want to learn more about how to use Ideate XRay to diagnose and fix stubborn Revit visibility issues? Watch this short video:
Explore recent posts


