Using Ideate BIMLink to Push To & From Room Data into Door Tags
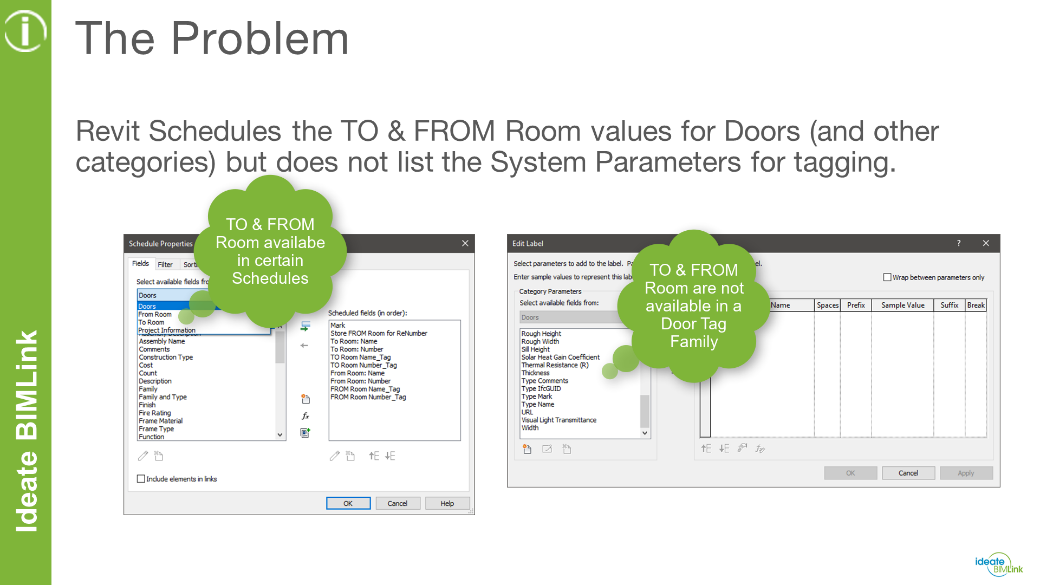
Revit allows users to schedule “To: Room” and “From: Room” values natively in a schedule, but those system parameters are not available to us natively in Revit tags.
For some large architectural and interior design firms, the need to schedule and tag the “To: Room” and “From: Room” parameters is a necessary part of their workflows. While Revit software does allow users to schedule “To: Room” and “From: Room” values natively in a schedule, those system parameters are not available to us natively in Revit tags.
Common Workaround
A common workaround for this workflow is to create custom “To Room” and “From Room” parameters that can be used for tags. The shared parameter creation process is very straightforward but copying the “To: Room” and “From: Room” data to the tag values can be painful, especially if done manually through a schedule or other means.
A Better Solution: Ideate BIMLink
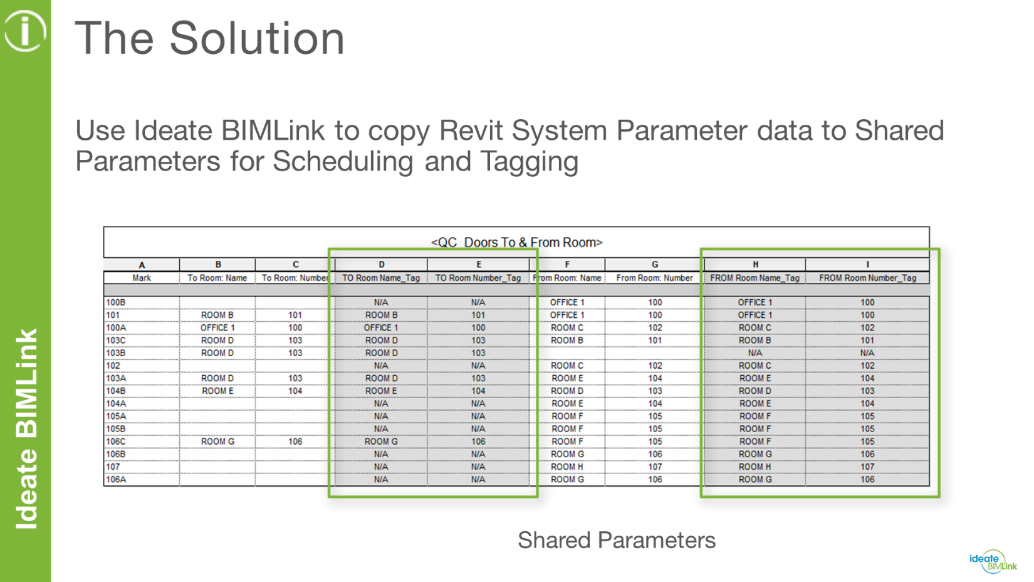
Thankfully, we can easily gather the “To: Room” and “From: Room” values using Ideate BIMLink and push those values into custom “To Room” and “From Room” parameters that can be used for custom door tags or other Revit categories that use “To Room” and “From Room” parameters.
Step-by-Step Instructions
The process for this workflow would look something like this:
- Create custom “To Room” and “From Room” Shared Parameters using Room name and Room Number
- Create custom tags, such as door tags and window tags that utilize the custom shared parameters
- Add the custom project shared parameters to your Revit templates and projects and map those parameters to the appropriate categories (doors, windows, etc.)
- Create quality control (QC) schedules that list the desired “To: Room” and “From: Room” parameters and your custom project shared tag parameters
- Using Ideate BIMLink, create a new link from your QC Schedule, which will automatically build a list of the parameter data you want to export to Excel
- Once the link has been created in Ideate BIMLink, you can export that data to Excel and copy the relevant data from the Revit “To: Room” and “From: Room” parameters over to your custom tag parameters
- Save the results and import the data back in using Ideate BIMLink. Your doors, windows, etc. should now have the tag values displayed in the QC schedules, the tags themselves, and in the properties palette of the selected elements
It is important to note that while this blog post focuses on gathering room data to push into door tags, the process of gathering data to push into custom parameters works for many other categories, such as areas, spaces, mechanical equipment, etc.
To learn more about this process, be sure to watch this video:
Request a Sample Dataset
Existing Ideate BIMLink customers can request a sample dataset to copy the parameters and tags to projects and templates by emailing us as support@ideatesoftware.com.
Explore recent posts


