Map Those in Excel! Associating MasterFormat Numbers to Model Elements Using Ideate BIMLink
General contractors and trade fabricators have historically used CSI MasterFormat as the primary way to classify cost estimation data in North America. In contrast, Building Information Modeling has favored the use of the UniFormat since the system is aligned with the digital creation of systems and assemblies, as opposed to materials and methods. In fact, Revit already provides UniFormat based Assembly Codes as type parameters in most system and out of the box component families. Even with the impetus of UniFormat, a large share of existing estimating practices still need the flexibility of mapping model elements with MasterFormat codes for estimating purposes. Whereas the adequacy of this 'mapping system' is largely debatable, and a topic beyond the purpose of this post, mapping existing system classification codes with new ones can be a daunting manual task using out-of-the-box Revit capabilities. However, using Ideate BIMLink, this task can be expedited significantly using Excel formulas. We will use the following 3-step workflow with Revit and Ideate BIMLink:
- Export our Revit data to Excel.
- Populate a custom Shared Parameter value with a MasterFormat code using an Excel formula that extracts the MasterFormat value from another database of mapped definitions.
- Reimport updated data into Revit
Export Revit Data to Excel We will start by exporting the UniFormat and MasterFormat parameter out of Revit using Ideate BIMLink. We will use the Plumbing Fixture category for the purpose of this demonstration, but could easily export the data from multiple categories at once. The parameter exported includes the 'Family Type,' 'Assembly Code,' 'Assembly Description,' and a shared parameter 'Master Format Code.'

The parameters are exported as an .xlsx file called 'Plumbing Fixture Codes' and opened in Excel. Here, we bring a database mapped identifiers we obtained from a source online. This database is a matrix of UniFormat codes mapped to its closest MasterFormat equivalent. You can build this matrix of mapped definitions yourself, or obtain them online. For a price, the Construction Specification Institute sells Excel definitions with UniFormat/MasterFormat titles and numbers. Populate a Custom Shared Parameter Value in Excel In Excel, use the 'Move or Copy' command to bring the Map of Definitions into the 'Plumbing Fixture Codes' spreadsheet.


Then populate the 'MasterFormat Code' column using Excel Formulas using the VLOOKUP formula. The VLOOKUP formula is a function that retrieves information from another database based on a supplied instance of a unique identifier. The goal is to retrieve the MasterFormat code from the Mapped Definition worksheet based on a common UniFormat identifier. The formula goes like this:

The formula arguments are as follows:
- What unique identifier are you looking up in the database? (MasterFormat)
- Where is the database? ('Map' worksheet range of values)
- Which column of the database, associated with the unique identifier, do you wish to have retrieved for you? (Second Column from the left)
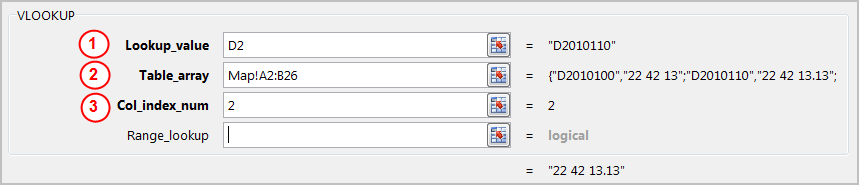
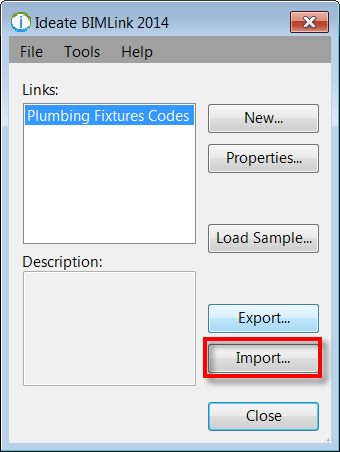
The Range_lookup is an optional argument and has to do with whether the column that contains the unique identifier is sorted on ascending or descending order; it requires to be either a TRUE or FALSE value, or be left blank like we just did. The formula is copied and pasted across in all the cells of the 'MasterFormat Code' column, and the values retrieved. If a value is missing on the map database, it will yield a #REF error. Reimport the Data Into Revit The last step is to save, close and reimport the Excel file into Revit using Ideate BIMLink.
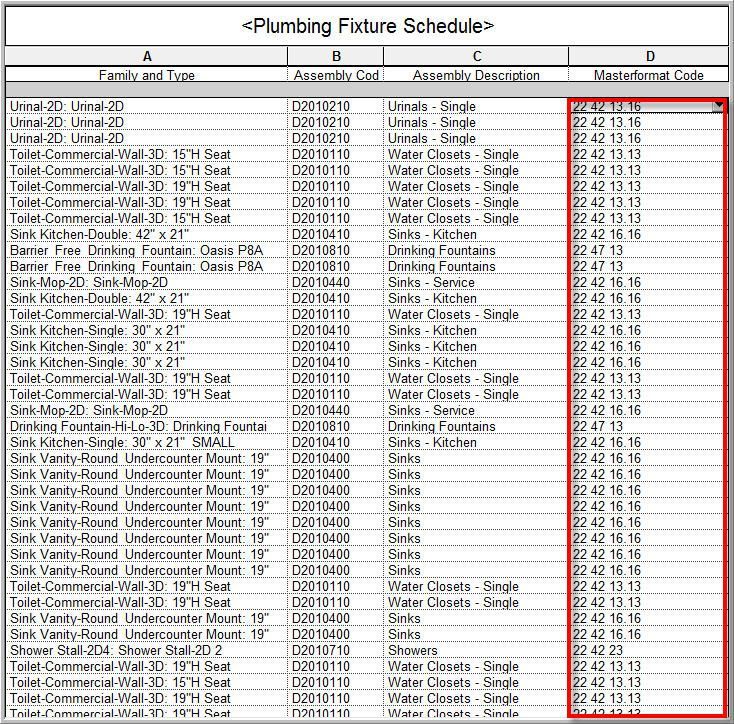
The final result is shown here as a Plumbing Fixture Schedule:
The workflow described here using Ideate BIMLink, expedites the task of associating new system classification codes to Revit families that otherwise would take hours to complete. The process is equally applicable to upgrade to new code classification releases, custom codes developed by specific estimating workflows, or any other code classifications applicable to regions outside the United States.
Explore recent posts


